A few posts back I reported that I had finished converting everything to get my XNA 3.1 code to work in XNA 4.0. Well I was close and everything worked on the PC but when I came to test on the Xbox I had some errors. Proper game stopping exceptions.
It's taken a few hours on and off to narrow down the problem and it's fixed now. The problem was code I had written to replace point sprites in one of my particle systems. Point sprites are no longer available in XNA. That is not a problem because triangle lists do the job just as well. The trouble was that I did not fully understand how vertexBuffers work and that the Xbox cannot reuse vertices until the GPU has finished with them.
In my defence the posts I read to find out how to resolve my issues were posted by some well respected programmers who were also caught out by the Xbox behaviour.
If you want to know more the comments in the code for the particle system sample were useful:
http://create.msdn.com/en-US/education/catalog/sample/particle_3d
As were the comments in the following old post:
http://forums.create.msdn.com/forums/t/33931.aspx
Now at last I can get on with editing some models and creating some more animations for use in the game.
Sunday, 12 December 2010
Saturday, 4 December 2010
Blender to XNA to be included in the next release of Blender
There is a good chance that the script I have just written to export from Blender to XNA will be included in the next release of Blender. Apparently it has to be tested and approved by some of the Blender administrators but it is already on their SVN server.
The instructions are now on a Blender Wiki page:
http://wiki.blender.org/index.php/Extensions:2.5/Py/Scripts/File_I-O/Blender-toXNA
The instructions are now on a Blender Wiki page:
http://wiki.blender.org/index.php/Extensions:2.5/Py/Scripts/File_I-O/Blender-toXNA
Tuesday, 30 November 2010
Blender 2.5 to XNA 4 animated FBX models
The following post is out of date because as from Blender 2.56 the scripts mentioned are all shipped with Blender. See the following post for more up to date information:
http://blog.diabolicalgame.co.uk/2011/07/exporting-animated-models-from-blender.html
==
Following on from my previous post on this subject I have managed to create an FBX exporter script for Blender 2.55 Beta that works with keyframe animations and imports in to XNA 4.0.
Due to the limitations with the Autodesk FBX importer that ships with XNA 4.0 the animations need to be loaded individually from separate FBX files but there are simple solutions available to work with that. Details and other links are in the Instructions with each of the following projects:
The package with several XNA FBX exporters for Blender 2.5 can be downloaded from:
http://code.google.com/p/blender-to-xna/
The most recent instructions are on the Blender Wiki:
http://wiki.blender.org/index.php/Extensions:2.5/Py/Scripts/File_I-O/Blender-toXNA
An XNA model viewer that has an option to load FBX files as separate animations:
https://code.google.com/p/take-extractor/
The XNA TakeExtractor project also demonstrates how to rotate models and their animations within the pipeline. That is useful for adjusting Blender models which face Z up to XNA's default which is Y up. Use a rotation while loading of X = 90, Y = 0, Z = 180. I think that ends up facing backwards because that is how my entire game appears to work and there is too much code for me to bother to change it!
Friday, 26 November 2010
Blender 2.5 to XNA 4 animated model pipeline
See the future linked post for more up to date information:
http://blog.diabolicalgame.co.uk/2011/07/exporting-animated-models-from-blender.html
The following is a bit out of date. If you want to know how to get models from Blender to XNA read the above linked post not this one.
==
It's been a while since I posted because I have been struggling with a problem since I finished the conversion to XNA 4.
As mentioned in my previous post, animated models from Blender would no longer display properly in XNA. If I had imported the animation in XNA 3.1 they would still work in 4.0 but when I tried to save new animations from the models using XNA 4, the animations were distorted.
I tried fixing the FBX exporter from Blender but the FBX file format is not documented making it difficult. To cut a long story short I have ended up with a solution that uses separate files for the animations.
The model, bones and bind pose are loaded in to XNA using FBX. Each animation is exported from Blender as a list of bone transform matrices. Those can then be imported in to XNA and converted to the AnimationClip format used by the Microsoft Skinning Sample. Edit: I now have FBX working see my next post.
The process takes a few steps but works with the models I have been using. It needs more testing with other models.
The package with several exporters for Blender 2.5 can be downloaded from:
http://code.google.com/p/blender-to-xna/
The most recent instructions are on the Blender Wiki:
http://wiki.blender.org/index.php/Extensions:2.5/Py/Scripts/File_I-O/Blender-toXNA
The XNA sample and model viewer demonstrating how to import the animations can be downloaded from:
https://code.google.com/p/take-extractor/
Both are on Google Code, if the links do not initially work, wait an hour and try again. Google appear to have frequent outages but none so far have lasted longer than an hour.
There are still several limitations with the pipeline some are the same limitations as with earlier versions of XNA and Blender:
- All parts (Blender Objects) of a model must have the same centre (Origin, ideally at Zero)
- All parts of the model must have a scale of 1.0
- Every vertex must be weight painted or added to the bone vertex group for animation.
- The model has to be loaded in XNA before the animations can be converted to AnimationClip format.
At the moment the animations cannot be rotated in the content pipeline! [Fixed, see future posts] My next job is to work out the maths to rotate the animations as they are imported.
==
Please make sure you read my future posts. I have done a lot more work to get it all working properly.
Monday, 15 November 2010
Dude for Blender
I have converted the Dude from the Microsoft XNA Skinning Sample in to Blender format. The transfer is not ideal but is enough to provide a starting point.
Dude in Blender
I have added an armature (bones) for animation and a test action called 'Walk'. This is for my own purposes but may be useful to others. It gives an idea of scale and a suitable mesh quality for use in games. Please note that my test animation is very poor.
Download Model
Dude for Blender (9.5Mb) March 2009 (Imperial scale)
Test Dude Animations (8.5Mb) November 2010 (Metric scale)
Saturday, 30 October 2010
Finished converting to XNA 4.0
At last I have done the final bit so that I can say I have everything in XNA 4.0 that I had in XNA 3.1
This final part was not a code change to the game but is a way to get animations from my models created in Blender in to XNA. In XNA 3.1 the FBX importer could read multiple takes from one FBX file and I took advantage of that to import all the animations. That is no longer built in to the FBX importer.
I am rather pleased with my solution. It is much more elegant than before. I have created myself a WinForm based application that can read FBX files created from Blender. It can split them in to one file per take and export the animation key frames in to the format I need.
Compared to games it is not a very pretty presentation. Functional with a text status window.
I can create a config file per model so that the extraction, conversion and renaming of takes, to match my in game requirements, is reproducible. I should probably have done it this way in the first place.
If you are interested the source code can be downloaded from:
http://code.google.com/p/take-extractor/
I can now remove a lot of redundant code from my game editor.
Edit: I spoke too soon. The animations do not work properly from XNA 4.0 so I still need an XNA 3.1 utility just to get the animations right. The game will still be in XNA 4.0! I'm trying to find an alternate exporter for Blender or other method to be able to use only XNA 4.
Monday, 18 October 2010
Anti-Aliasing with XNA 4
I've spent all weekend struggling with getting Anti-Aliasing (AA) working with XNA 4. I compared my old XNA 3.1 version with my updated XNA 4 version and noticed that the graphics on the menus looked awful on the new one!
This was obviously because AA, multi-sampling, was not enabled on the new version. Some of the settings used to enable this in XNA 3.1 had been replaced in XNA 4. I therefore spent a lot of the weekend on the assumption that I just needed to get the settings right within XNA.
I asked for help on the XNA forums so you can read the saga there as well.
To demonstrate the problem, the following rather rough picture is a small portion of the screen illustrating the effect:
The following much smoother shot shows what I was expecting:
To cut a long frustrating story short. On advice I created a small app that had nothing but one model and a background and that helped to narrow the problem down. It was not within the XNA code but it was in the HLSL shader code.
These three lines turn off anti-aliasing in XNA 4.0 and do nothing in XNA 3.1!
MinFilter = Point;
MagFilter = Point;
MipFilter = Point;
I removed those three lines and everything was back to what I expected. This is the end result:
I've gone a little further and checked out the other options for the texture filters when set within the HLSL fx file. I got the options from the following web page:
http://msdn.microsoft.com/en-us/library/bb322811(VS.85).aspx
The results are:
Min, Mag and Mip filters = Point -> AA gets turned off
Min, Mag and Mip filters = Linear -> AA works
Min and Mag filters = Anisotropic -> AA works
Mip filter = None -> AA works but the result was grainy
Min and Mag filters = PyramidalQuad -> Failed to compile
Min and Mag filters = GaussianQuad -> Failed to compile
My conclusion is that I should remove everything from my HLSL effect files that can now be set within XNA 4.0 and I should set those from within XNA. As always one of Shawn Hargreaves blog posts is most useful for that.
[Edit: change of plan again. I completely re-wrote my shaders and now the filtering is in XNA code... again.]
Monday, 11 October 2010
More XNA 4 stuff
Over the weekend and still continuing the XNA forums are down for an upgrade. Everyone suspects this is because of the Windows Phone 7 launch.
This is inconvenient and I have had to resort to Twitter for advise. Not as bad as I thought everyone was very helpful. Thanks to @mikebmcl, @UberGeekGames and others. 140 characters is a bit short to get much across but I got what I needed to know.
I had to re-write the muzzle flash code to make it easier to change the graphic. My previous code, working in XNA 3.1, produced a too harsh effect in XNA 4. I wanted it to fade out a bit more at the edges. In the process I discovered that the new XNA 4 Particle3D sample on the creators club uses the XNA 3.1 syntax for VertexDeclarations. It did not stop it working but I like to use the best methods so I re-wrote those as well.
I have three major areas left to get working properly. Shadows, which are now very rough on Windows because of the enforced HLSL instruction slot limits, 512 for PS_3_0. As the game is for the Xbox360 I am not going to worry about that until I see the results on the 360.
Animations are limited to only one per FBX file. I am also not worried about this because at worst I could export all my animations from Blender one at a time. I will most likely change the code to simply use the FBX file almost unchanged instead of my own animation format only invented in order to save the animations individually.
What I am left with to deal with are triangles... The new model class has a separate VertexBuffer for each mesh. The old one had one vertex buffer for the whole model. In theory I should find this easier to extract triangles from each model. My first quick guess did not work.
I need to reinstate my debug code that lets me view the triangles so that I know when I have got it right.
In game the collision is based on spheres but the editor uses the triangles to calculate the location of the spheres. In game the only time the individual triangles are used is to calculate the orientation of bullet impact decals so that they line up correctly with the faces of the model.
I'd better get on with it instead of typing this.
[Edit]
I did what I said and the resulting code to extract triangles can be found on the following web page:
http://www.discoverthat.co.uk/games/xna.htm#vertex
I found another similar blog giving yet more useful details on the transition from XNA 3.1 to 4.0 it covers much of the same ground as my posts but also has some example code:
http://blogs.microsoft.co.il/blogs/grozen/archive/2010/10/23/converting-a-3d-xna-3-0-game-to-xna-4-0-an-example.aspx
Wednesday, 6 October 2010
XNA 4.0 from XNA 3.1
Last night my code finally compiled in XNA 4.0. I had reached a good point last Friday and thought I had some time so I decided then was a good time to upgrade. For those reading this who are not familiar with XNA. It is the game development framework that Microsoft has provided for Indie and hobby developers. It is based on C# and is the only way for hobby programmers to release games on the Xbox 360.
XNA 4.0 is the latest version. It has some improvements but also some pain converting from the older version. In all it has taken me about 20 hours to get this far.
The unexpected problem is that the model of the space ship is showing it's insides on the outside. I'm sure I will work out how to fix it but at the moment it is a bit frustrating!
What I wanted to write here was just a list of all the things I have had to do to convert from XNA 3.1 to XNA 4.0. Partly to let off steam and hopefully to help some other people doing the same. I've included some useful links as well.
- The conversion to XNA 4.0 did not get all the references right.
I had to manually remove them and re-add them. This cannot be done from within the IDE it was necessary to edit the project file with a text editor. Very quick and painless.
Remove and re-add References. Most can be added back using Visual Studio but a couple have to be manually edited:
mscorlib (can not add back with VS edit .csproj file)
System
System.Core (can not add back with VS edit .csproj file)
System.Xma
System.Xml.Linq
To add back missing items see the following post:
http://social.msdn.microsoft.com/Forums/en/windowsphone7series/thread/07af6fac-7b07-4dca-b9de-7e18c01d5f0b
The .csproj file needs to be edited manually using a text editor. Remember to close Visual Studio first.
The following image shows the syntax for the .csproj file:
I have not, as yet, changed the graphics to match. Hence the mess in the above picture.
http://blogs.msdn.com/b/shawnhar/archive/2010/04/08/premultiplied-alpha-in-xna-game-studio-4-0.aspx
Changed new Color(colour, alphaByte) [0 to 255] to colour * alphaFloat [0.0 to 1.0]
- Several changes to the shader effect files
AdderssU and V only support: Wrap, Clamp and Mirror.
Border and BorderColor are gone.
http://blogs.msdn.com/b/shawnhar/archive/2010/04/02/state-objects-in-xna-game-studio-4-0.aspx
Set all the Mip, Mag and Min filters on the shadowmaps to Point. Not sure why but unless I do that I get an exception when running the game.
The new effect shader compiler is also much fussier on Windows. It enforces the minimum number of instruction slots for each shader model, e.g. PS 3 can have a minimum of 512 instruction slots. My graphics card could have more but the compiler does not let me use them. The Xbox 360 compiler is virtually unchanged and so my old shader code compiled for the Xbox but not for Windows. I've had to reduce the quality of the shadows on Windows to fit within the 512 limit in one pass. I've added a compiler directive #if defined(XBOX360) so I can do that.
- Re-wrote the way the sky is drawn. The new Creators Club sample no longer uses a separate effect file.
http://creators.xna.com/en-GB/sample/generatedgeometry
[Edit: had to re-instate the old version because the new one did not work with my terrain!]
- Changed the exception in the Skinned model prosessor to a warning about not having any animations.
My models already have separate animations so the skinned models need to be loaded even though they do not have any animations included with them.
- I have temporarily removed my built in screen shot class. Resolve back buffer has been removed and it is now necessary to use a RenderTarget to get the screenshot. As this puts unnecessary code in to my draw loop I have not done it yet.
The screenshots are only for my benefit and they were not going to be in the finished game so it's no loss.
http://blogs.msdn.com/b/shawnhar/archive/2010/03/30/resolvebackbuffer-and-resolvetexture2d-in-xna-game-studio-4-0.aspx
http://blogs.msdn.com/b/shawnhar/archive/2010/03/26/rendertarget-changes-in-xna-game-studio-4-0.aspx
http://forums.xna.com/forums/t/55428.aspx
- Removed all Depth Stencil buffers and added back the type in the RenderTarget2D where necessary.
Reading about this was more confusing than just doing it. The new XNA 4.0 method is much easier.
http://blogs.msdn.com/b/shawnhar/archive/2010/03/16/breaking-changes-in-xna-game-studio-4-0.aspx
http://www.innovativegames.net/blog/blog/2010/07/13/xna-4-0-breaking-changes-rendertargets/
http://blogs.msdn.com/b/shawnhar/archive/2010/03/26/rendertarget-changes-in-xna-game-studio-4-0.aspx
- VertexDeclarations are also no longer needed.
http://blogs.msdn.com/b/shawnhar/archive/2010/04/19/vertex-data-in-xna-game-studio-4-0.aspx
All you need is: graphicsDevice.SetVertexBuffer(vertexBuffer);
Lots of lines deleted.
- The syntax for drawing user primitives has been simplified
Most of my code now just reads something similar to the following, instead of all the Begin() and End() methods, just:
basicEffect.CurrentTechnique.Passes[0].Apply();
http://www.bit-101.com/blog/?p=2832
- Replaced my particle system with a version based on the new sample because the old sample was based on point sprites which are no longer supported.
http://creators.xna.com/en-GB/tutorial/particlexml
Fairly easy change but as yet untested.
[Edit: needed further work to get it working nicely.]
- Changed every SpriteBlendMode.AlphaBlend to BlendState.AlphaBlend.
There were a lot of them in my code but easy to find and replace.
- On one page I used a Scissor test and the syntax has change to use RasterizerState.ScissorTestEnabled
- The Texture load and save functions have been improved.
I have changed all my BMP files to now use PNG.
http://blogs.msdn.com/b/shawnhar/archive/2010/05/10/image-codecs-in-xna-game-studio-4-0.aspx
[Edit: this saved as pre-multipled alpha which was not what I needed so I have had to change one file format.]
- Lots of changes on the storage side of things.
There is no TitleLocation anymore.
I have had to use the Manifest example for some lists:
http://creators.xna.com/en-GB/sample/contentmanifestextensions
I have changed how the StorageContainer is accessed for saving user files:
http://blogs.msdn.com/b/nicgrave/archive/2010/07/23/storage-in-xna-game-studio-4-0.aspx
For my editor I have used .NET System.IO file methods and a semi hard coded path to the same place as the user storage location in Windows. This is because the Path attribute from the StorageContainer has been removed.
I could have used any location for the editor but that one keeps everything in one known place.
A useful method is:
System.Environment.GetFolderPath(Environment.SpecialFolder.MyDocuments)
- The syntax for turning on Antialising has changed or at least the method I was using has gone. The method I now use is:
graphicsDevice.PreferMultiSampling = true;
[Edit: this needed a lot more work see the future post.]
That's what I have done so far. The game works but looks awful so I still have lots more work to do to get back to where I was with the older version a week ago!
[Edit: After I did my conversion I found better tutorials: http://www.nelxon.com/blog/xna-3-1-to-xna-4-0-cheatsheet/ ]
Tuesday, 5 October 2010
Get the triangles at run time from a model
The following is based on various other code and was produced with assistance from the XNA forums.
Download Source Code
Vertex Helper XNA 4.0 class (3kb) Oct. 2010
The following reads the vertex buffer of each model mesh part and stores the triangles in a vertex and index array.
A version of the above working in XNA 3.1 is available from: enchantedage.com
Download Source Code
Vertex Helper XNA 4.0 class (3kb) Oct. 2010
The following reads the vertex buffer of each model mesh part and stores the triangles in a vertex and index array.
public class VertexHelper
{
 public VertexHelper()
 {
 }

 public struct TriangleVertexIndices
 {
  public int A;
  public int B;
  public int C;
 }

 ///
 /// Extract the vertices and indices from the specified model
 ///
 /// Output the list of vertices
 /// Output the list of indices
 /// The models world position or use Matrix.Identity for object space
 public static void ExtractTrianglesFrom(Model modelToUse, List vertices, List indices, Matrix worldPosition)
 {
  Matrix transform = Matrix.Identity;
  foreach (ModelMesh mesh in modelToUse.Meshes)
  {
   // If the model has bones the vertices have to be transformed by the bone position
   transform = Matrix.Multiply(GetAbsoluteTransform(mesh.ParentBone), worldPosition);
   ExtractModelMeshData(mesh, ref transform, vertices, indices);
  }
 }

 ///
 /// Transform by a bone position or Identity if no bone is supplied
 ///
 public static Matrix GetAbsoluteTransform(ModelBone bone)
 {
  if (bone == null)
  {
   return Matrix.Identity;
  }
  return bone.Transform * GetAbsoluteTransform(bone.Parent);
 }

 ///
 /// Get all the triangles from all mesh parts
 ///
 public static void ExtractModelMeshData(ModelMesh mesh, ref Matrix transform,
  List vertices, List indices)
 {
  foreach (ModelMeshPart meshPart in mesh.MeshParts)
  {
   ExtractModelMeshPartData(meshPart, ref transform, vertices, indices);
  }
 }

 ///
 /// Get all the triangles from each mesh part (Changed for XNA 4)
 ///
 public static void ExtractModelMeshPartData(ModelMeshPart meshPart, ref Matrix transform,
  List vertices, List indices)
 {
  // Before we add any more where are we starting from
  int offset = vertices.Count;

  // == Vertices (Changed for XNA 4.0)

  // Read the format of the vertex buffer
  VertexDeclaration declaration = meshPart.VertexBuffer.VertexDeclaration;
  VertexElement[] vertexElements = declaration.GetVertexElements();
  // Find the element that holds the position
  VertexElement vertexPosition = new VertexElement();
  foreach (VertexElement vert in vertexElements)
  {
   if (vert.VertexElementUsage == VertexElementUsage.Position &&
    vert.VertexElementFormat == VertexElementFormat.Vector3)
   {
    vertexPosition = vert;
    // There should only be one
    break;
   }
  }
  // Check the position element found is valid
  if (vertexPosition == null ||
   vertexPosition.VertexElementUsage != VertexElementUsage.Position ||
   vertexPosition.VertexElementFormat != VertexElementFormat.Vector3)
  {
   throw new Exception("Model uses unsupported vertex format!");
  }
  // This where we store the vertices until transformed
  Vector3[] allVertex = new Vector3[meshPart.NumVertices];
  // Read the vertices from the buffer in to the array
  meshPart.VertexBuffer.GetData(
   meshPart.VertexOffset * declaration.VertexStride + vertexPosition.Offset,
   allVertex,
   0,
   meshPart.NumVertices,
   declaration.VertexStride);
  // Transform them based on the relative bone location and the world if provided
  for (int i = 0; i != allVertex.Length; ++i)
  {
   Vector3.Transform(ref allVertex[i], ref transform, out allVertex[i]);
  }
  // Store the transformed vertices with those from all the other meshes in this model
  vertices.AddRange(allVertex);

  // == Indices (Changed for XNA 4)

  // Find out which vertices make up which triangles
  if (meshPart.IndexBuffer.IndexElementSize != IndexElementSize.SixteenBits)
  {
   // This could probably be handled by using int in place of short but is unnecessary
   throw new Exception("Model uses 32-bit indices, which are not supported.");
  }
  // Each primitive is a triangle
  short[] indexElements = new short[meshPart.PrimitiveCount * 3];
  meshPart.IndexBuffer.GetData(
   meshPart.StartIndex * 2,
   indexElements,
   0,
   meshPart.PrimitiveCount * 3);
  // Each TriangleVertexIndices holds the three indexes to each vertex that makes up a triangle
  TriangleVertexIndices[] tvi = new TriangleVertexIndices[meshPart.PrimitiveCount];
  for (int i = 0; i != tvi.Length; ++i)
  {
   // The offset is because we are storing them all in the one array and the
   // vertices were added to the end of the array.
   tvi[i].A = indexElements[i * 3 + 0] + offset;
   tvi[i].B = indexElements[i * 3 + 1] + offset;
   tvi[i].C = indexElements[i * 3 + 2] + offset;
  }
  // Store our triangles
  indices.AddRange(tvi);
 }


}
A version of the above working in XNA 3.1 is available from: enchantedage.com
Sunday, 26 September 2010
Radar
I took a break from preparing my character for animation to do a bit of coding. One of the many small tasks on my list of things to do.
I've added the radar which works along side the compass.
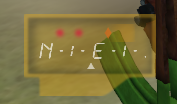
It has all the features you would expect including colour coding for friend or foe and markers for your mission goal. The dots vary in size depending on how far away the other character is.
It took a bit longer than expected to code. Mainly just tweeking to get it to look the way I wanted. I did have a rooky mistake that wasted an evening. At one point everything was always at the same point and no matter what I did it stayed there. Turned out I had cast the result of some floating point maths to an integer!
I've added the radar which works along side the compass.

It has all the features you would expect including colour coding for friend or foe and markers for your mission goal. The dots vary in size depending on how far away the other character is.
It took a bit longer than expected to code. Mainly just tweeking to get it to look the way I wanted. I did have a rooky mistake that wasted an evening. At one point everything was always at the same point and no matter what I did it stayed there. Turned out I had cast the result of some floating point maths to an integer!
Sunday, 12 September 2010
Animations
I hadn't posted for a while so I thought I'd give a quick update.
I have the first of my player characters ready to animate. To get from the stage of receiving the model from the artist to being ready to animate has taken two weekends with lots of 3D editing and I also decided that before I animate this model I would tidy up some of the game code that is used to move the models.
I've changed the importer to rotate the model for me rather than applying a matrix rotation every frame. I've also changed the way weapons are held.
Back to the animations. My plan is that all of the same type of model will use the same animation keyframes. This means that each model file is smaller because the animations are stored separately.
The disadvantage is that every model has to start off in the same pose and have the same armature. The armature is the skeleton used to animate an organic model. It is also referred to as a rig.
During development I have changed things that affect the skeleton several times or at least changed what I need from the rig. This time I have added an extra bone for the weapon to attach to. Previously I had attached the model directly to the hand but although this worked it made it very difficult to line up which way the weapon was facing with the position of the hands holding that weapon.
This is the skeleton and the bind pose I have settled on.
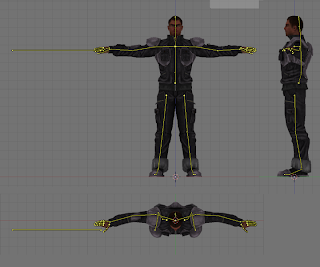
This will be the third time I have done the animations and I would like it to be the final one. I am not an animator. I have had to learn animation almost from scratch so it takes me a long time to get it right.
I have the first of my player characters ready to animate. To get from the stage of receiving the model from the artist to being ready to animate has taken two weekends with lots of 3D editing and I also decided that before I animate this model I would tidy up some of the game code that is used to move the models.
I've changed the importer to rotate the model for me rather than applying a matrix rotation every frame. I've also changed the way weapons are held.
Back to the animations. My plan is that all of the same type of model will use the same animation keyframes. This means that each model file is smaller because the animations are stored separately.
The disadvantage is that every model has to start off in the same pose and have the same armature. The armature is the skeleton used to animate an organic model. It is also referred to as a rig.
During development I have changed things that affect the skeleton several times or at least changed what I need from the rig. This time I have added an extra bone for the weapon to attach to. Previously I had attached the model directly to the hand but although this worked it made it very difficult to line up which way the weapon was facing with the position of the hands holding that weapon.
This is the skeleton and the bind pose I have settled on.

This will be the third time I have done the animations and I would like it to be the final one. I am not an animator. I have had to learn animation almost from scratch so it takes me a long time to get it right.
Saturday, 14 August 2010
Windows vs Xbox360
I do most of my development and testing on Windows. It's a much quicker cycle from code to test to code again. From time to time I have to test on the Xbox360 to make sure it all runs.
Whenever I test on the 360 there are always differences. The number of times I have seen a code 4 error! This time it was very unexpected because it was type casting.
I had tidied up my storage code. I had lots of the same loading and saving code where the only difference was the class of file it was working with. I did the obvious and converted it to a generic function using the base 'object' class and type cast to the type I needed.
This all worked perfectly first time on Windows. Not at all on the Xbox360. Turns out that no matter how I try I cannot return a value when I cast it back from the 'object' class. On the Xbox360 it always returns null.
I re-wrote the code so I didn't have to return a value. I keep the generic 'object' in the one method and have a set of if statements to store the results in the correct type. Not as neat but it works.
While on the subject of peculiarities and storage the Guide function on the 360 can be misleading. Sometimes it returns busy when it is not or perhaps it was a moment ago but it's not now! I have had to add several automatic retry loops in my code to avoid that problem.
Friday, 6 August 2010
Menus
Once I started I couldn't finish.
Following on from making the menu controls more consistent I deviated on to making the menus look better. I already had a fully working and complete menu system but it needed something.
For the last few weeks I've been working on the graphics for the menu screens. I am just about finished now.
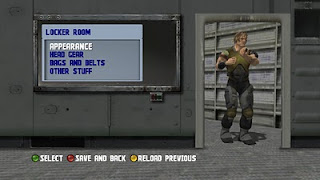
My original plan had always been to have a menu system that felt like you were already in the game. I had put that idea aside because of the extra work on top of the game to get that working. That is what I have now done.
Plenty of other games have similar interfaces and I am pleased with my implementation. Each menu screen looks like the view inside a space ship. Not the shiniest of crafts but a more utilitarian vessel.
Following on from making the menu controls more consistent I deviated on to making the menus look better. I already had a fully working and complete menu system but it needed something.
For the last few weeks I've been working on the graphics for the menu screens. I am just about finished now.

My original plan had always been to have a menu system that felt like you were already in the game. I had put that idea aside because of the extra work on top of the game to get that working. That is what I have now done.
Plenty of other games have similar interfaces and I am pleased with my implementation. Each menu screen looks like the view inside a space ship. Not the shiniest of crafts but a more utilitarian vessel.
Saturday, 31 July 2010
Notepad++ for HLSL fx file syntax highlighting
I got to the stage in my coding that I needed to do more HLSL shaders. I had used Visual Studio to do the initial editing but it does not colour code HLSL fx files. I tried to add colour coding to Visual Studio but I think the free Express version does not support highlighting of other file types.
The first choice was to use NVidia FX Composer. I didn't get on with that. It looked clever with drag and drop shader creation and immediate preview but the learning curve to work out how to do a specific effect not already built in was too great. I also struggled to use some of the built in ones so I decided to revert to a normal text editor.
My editor of choice is Notepad++. Totally free, quick and you can add custom syntax highlighting.
HLSL Syntax Highlighting
I found several examples of colour coding for HLSL effect files with a quick search on the web. The trouble was none of them quite looked right to me.
The one available for download from the Notepad++ library site on sourceforge had some typing mistakes. Others had insufficient keywords or font and colour choices not to my liking. So I've created my own variant. I don't claim it to be perfect it just meets my requirements.
Lots of keywords
Similar colour choices to Visual Studio
All one font type and size
My other criterion was an additional file extension of 'fxh' as well as 'fx'. I use 'fxh' for include files which I find I use a lot when working with HLSL effect files.
Download XML
Notepad++ userDefineLang.xml for HLSL (zipped 2kb) July 2010
Installation
I may not have read the instructions properly but the only ones I found told me to copy the userDefineLang.xml file to the program folder of Notepad++.
'C:\Program Files\Notepad++'
That did not work on either of the machines I tried. Windows XP nor Windows 7. In both cases the userDefineLang.xml file had to be in the users Application Data folder. This varies between operating systems but is similar to the following:
'C:\Documents and Settings\%username%\Application Data\Notepad++'
'C:\Users\%username%\AppData\Roaming\Notepad++'
If you already have a userDefineLang.xml file for something else, you can simply add the new language to the end of the existing one in the same file. Remove the duplicated pair of <NotepadPlus> tags from the middle.
Monday, 26 July 2010
Consistency
As I had been tinkering about with the HUD design I decided to use a similar style for the game menus.
This led me on to notice that the controls on the various menu screens were not consistent. My initial idea over a year ago had been to try to minimise the number of buttons that needed to be pressed. It sounded like a good idea but it ended up with the screens not being consistent. You had to carefully look at the controls on each menu screen before you knew what to do!
The new version works the same on every screen.
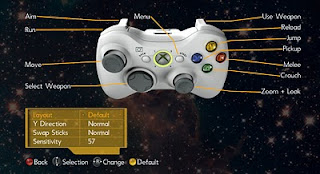
I spent the weekend going through all my menus and making them use the same controls for the same things which inevitably led back to the same way all other games work. I should have just copied everyone else in the first place. Well you live and learn.
Each option is up and down and to change each value you use left and right. B always goes back and saves if necessary.
Frustrating re-working things but I have taken the opportunity to tidy lots of things up and create some controls classes for drawing the buttons and some frames on the menus. When I create the next screen it will be so much easier.
This led me on to notice that the controls on the various menu screens were not consistent. My initial idea over a year ago had been to try to minimise the number of buttons that needed to be pressed. It sounded like a good idea but it ended up with the screens not being consistent. You had to carefully look at the controls on each menu screen before you knew what to do!
The new version works the same on every screen.

I spent the weekend going through all my menus and making them use the same controls for the same things which inevitably led back to the same way all other games work. I should have just copied everyone else in the first place. Well you live and learn.
Each option is up and down and to change each value you use left and right. B always goes back and saves if necessary.
Frustrating re-working things but I have taken the opportunity to tidy lots of things up and create some controls classes for drawing the buttons and some frames on the menus. When I create the next screen it will be so much easier.
Thursday, 15 July 2010
Collision
I've just been asked on a forum how I went about collision. As it links in to the model editor changes I made in the last post I thought I'd write up a summary.
To cut a long story short I have written three collision systems. The first two were Octrees based on a Ziggyware example. These worked nicely until I tried to get a smaller level of detail. The exponential amount of data this produced in the first version made the load time on the Xbox 360 about 7 minutes for a simple level! The second variation got down to 24 seconds load time but I still had not got the level of detail I wanted.
The final solution was grid registration. This assumes that even in a 3D scene most of the objects are positioned on a 2D plane. The world is mainly on a single level until you go inside a building.
The solution is to simply divide the world up in to a grid. Then work out where on that grid any object falls. It can fall in to several grid squares. Objects above each other would be in the same grid square.
When working out if a moving objects hits a stationary object first check the grid they are in. Then simply loop through all objects in the grid and carry out whatever collision test is needed.
My collision as previously stated is based entirely on spheres. Each object, animated, rigid, moving or static is divided up in to big spheres and then smaller spheres.
Every model and every sphere has an index and large spheres contain the index of the smaller spheres within and the smaller spheres contain the index of the triangles within.
The triangle are for use with positioning decals of bullet impacts which I won't go in to here.
Bump collision is now a simple series of loops testing each sphere in the moving object with each sphere in the static objects that are within the same grid. Working from the larger sphere to the smaller spheres. If any smaller spheres intersect then work out the overlap and use that to calculate an amount to push the spheres and therefore the models apart.
The collision of moving object against moving object does not use the grid but is fundamentally the same.
As I have a maximum of 32 moving objects at any one time in the game, I just test all 32 against each other. This is done first, so the end result is that moving objects could fractionally overlap other moving objects if they bounce off a static object but a moving object cannot end up overlapping a static object.
Monday, 12 July 2010
Model Editor
Since completing the shadow mapping I've added normal mapping to the shader and started to look at adding more models to the level.
I purchased some spaceship models from 3DRT.com which are in a style that suits the game.
To get them to work in the game I have to add collision bounds to them. In my case all the bounds in the game are based on spheres. I have a function that divides the model up in to larger and then smaller spheres.
That works well but does not care if a sphere overhangs an edge. In the case of square buildings this does not cause any noticable problems. These space ships have overhanging wings.
While testing them I kept getting stuck where I should not have got stuck. I had to write an editor for my bounds creation function so that I can remove bounding spheres that unnecessarily get in the way.
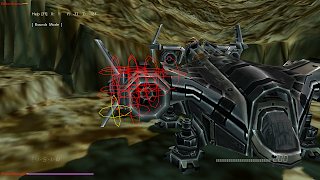
Most of the code I needed to do this was already in the game. I find this a lot now. Most of what I have to change or add is just a variation of something I've already written so the game is moving on more quickly now.
In the above picture you can see the small spheres clusterred round one part of the model. The whole model is coverred with those spheres but to make collision detection quicker those spheres are included in a larger sphere. The small group shown above are the smaller spheres in just one of the larger spheres.
Just in case its not obvious, those spheres are never visible in game. I had to deliberately add the line drawn circles to visualise them while editing. A long time ago I added a shapes class to the game that is only used by the editor to represent frustums, bounding spheres, bullet trajectories and anything else where I needed to visualise the result of some function or other. Over time I have a lot of options that I can overlay on the view.
I purchased some spaceship models from 3DRT.com which are in a style that suits the game.
To get them to work in the game I have to add collision bounds to them. In my case all the bounds in the game are based on spheres. I have a function that divides the model up in to larger and then smaller spheres.
That works well but does not care if a sphere overhangs an edge. In the case of square buildings this does not cause any noticable problems. These space ships have overhanging wings.
While testing them I kept getting stuck where I should not have got stuck. I had to write an editor for my bounds creation function so that I can remove bounding spheres that unnecessarily get in the way.

Most of the code I needed to do this was already in the game. I find this a lot now. Most of what I have to change or add is just a variation of something I've already written so the game is moving on more quickly now.
In the above picture you can see the small spheres clusterred round one part of the model. The whole model is coverred with those spheres but to make collision detection quicker those spheres are included in a larger sphere. The small group shown above are the smaller spheres in just one of the larger spheres.
Just in case its not obvious, those spheres are never visible in game. I had to deliberately add the line drawn circles to visualise them while editing. A long time ago I added a shapes class to the game that is only used by the editor to represent frustums, bounding spheres, bullet trajectories and anything else where I needed to visualise the result of some function or other. Over time I have a lot of options that I can overlay on the view.
Wednesday, 7 July 2010
Shadows
A year ago I started working on shadows for the game. I had decided that it was essential to have them but as the game is a shooter they do not have to be perfect. They have to be good enough and fast.
Before you critisise that decision take a look at some of the AAA games. The quality of shadows varies considerably. Ghost Recon has near perfect shadows but Gears Of War only has good shadows cast from the characters. Some scenery does not cast shadows at all or only casts it on other static objects! If you play either game you will be happy with the result although in Ghost Recon just occasionally you may notice that the drone high up in the sky casts a shadow on the ground.
A year ago I knew nothing about shaders. My method was to take the Creators Club shadow sample and try to join it to the Creators Club skinning sample. It took me three months to work it all out. In the process I was learning about animation and about effect shaders.
The result was not good enough but I needed to move on and get more of the game created. I knew I would return to it. That time was this week.
I now know much more about shaders. I've re-written them many times to add the terrain texturing, decals with transparency and to make use of effect pools. Effect pools were the best improvement because I use the shared prefix which means I can set the parameters just once for the entire scene rather than once per mesh! [Edit: XNA 4.0 removed effect pools! I had to add a lot of code back in!]
That also meant I now only had to edit one effect file which was shared by all of the draw calls for all objects static or animated.
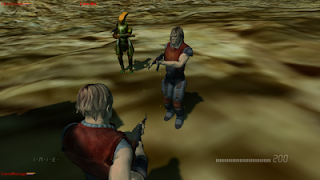
The above is the finished result which I am pleased with.
That uses Parallel Split ShadowMaps (PSSM) with edge tap smoothing Percentage Closer Filtering (PCF).
A lot of the time was tweeking the various settings to get them to all work together. The split distances have to be just right, the number of samples for the PCF has to be just right and to get any speed I have to keep the shadow map sizes to 512x512. I use 4 parallel splits but I calculate them at different frames to minimise the impact on performance.
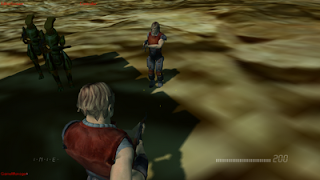
To get the shadows to overlap and cover the correct models as they move past the shadows it is necessary to draw the objects with the furthest away from the light source drawn first and then in order of the next closest and so on. That sort is done on the CPU not the GPU. The CPU on the Xbox 360 is poor compared to a PC so that sort has to be efficient.
Although the coding is all mine I can't claim the design. Many many clever people have come up with the maths formulea and put it in to code or articles. The NVidia developer site was essential reading but the final finishing touches was based on an XNA forum post. I'd like to thank everyone who has shared any shader or other code about shadows. I've probably read or looked at them all in the last year.
Before you critisise that decision take a look at some of the AAA games. The quality of shadows varies considerably. Ghost Recon has near perfect shadows but Gears Of War only has good shadows cast from the characters. Some scenery does not cast shadows at all or only casts it on other static objects! If you play either game you will be happy with the result although in Ghost Recon just occasionally you may notice that the drone high up in the sky casts a shadow on the ground.
A year ago I knew nothing about shaders. My method was to take the Creators Club shadow sample and try to join it to the Creators Club skinning sample. It took me three months to work it all out. In the process I was learning about animation and about effect shaders.
The result was not good enough but I needed to move on and get more of the game created. I knew I would return to it. That time was this week.
I now know much more about shaders. I've re-written them many times to add the terrain texturing, decals with transparency and to make use of effect pools. Effect pools were the best improvement because I use the shared prefix which means I can set the parameters just once for the entire scene rather than once per mesh! [Edit: XNA 4.0 removed effect pools! I had to add a lot of code back in!]
That also meant I now only had to edit one effect file which was shared by all of the draw calls for all objects static or animated.

The above is the finished result which I am pleased with.
That uses Parallel Split ShadowMaps (PSSM) with edge tap smoothing Percentage Closer Filtering (PCF).
A lot of the time was tweeking the various settings to get them to all work together. The split distances have to be just right, the number of samples for the PCF has to be just right and to get any speed I have to keep the shadow map sizes to 512x512. I use 4 parallel splits but I calculate them at different frames to minimise the impact on performance.

To get the shadows to overlap and cover the correct models as they move past the shadows it is necessary to draw the objects with the furthest away from the light source drawn first and then in order of the next closest and so on. That sort is done on the CPU not the GPU. The CPU on the Xbox 360 is poor compared to a PC so that sort has to be efficient.
Although the coding is all mine I can't claim the design. Many many clever people have come up with the maths formulea and put it in to code or articles. The NVidia developer site was essential reading but the final finishing touches was based on an XNA forum post. I'd like to thank everyone who has shared any shader or other code about shadows. I've probably read or looked at them all in the last year.
Monday, 28 June 2010
Head up display
I managed to get a lot done this weekend. Not that I got any more time than normal but for a change most things worked first time as I had intended.
I wanted to check how much ammunition was left before being able to shoot. That inevitably led on to how I was going to display that to the player.
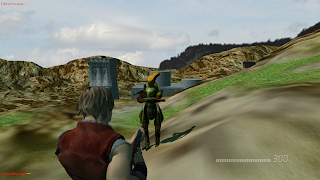
The ammo display allows for different magazine capacities and changes colour when the total carried gets low.
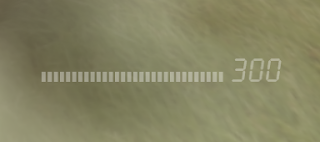
I also wrote the code to be able to reload including the sound effects and to be able to change weapon. This sounds simple but remember it has to happen over a period of time not instantly so there is more to it than you initially think.
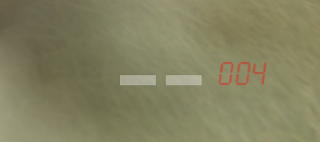
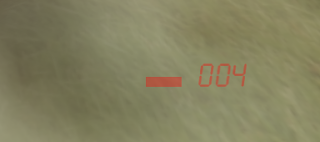
I have some additional ideas that I intend to add to improve the display as the work progresses.
I wanted to check how much ammunition was left before being able to shoot. That inevitably led on to how I was going to display that to the player.

The ammo display allows for different magazine capacities and changes colour when the total carried gets low.

I also wrote the code to be able to reload including the sound effects and to be able to change weapon. This sounds simple but remember it has to happen over a period of time not instantly so there is more to it than you initially think.


I have some additional ideas that I intend to add to improve the display as the work progresses.
Wednesday, 16 June 2010
Behaviour
I've been playing with code to add behaviour to the bots. At the moment this only relates to basic movement. They will either chase an enemy or return to their original task.
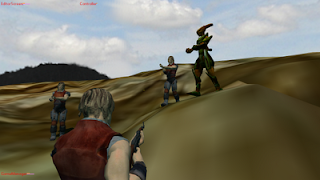
I am pleased with the results. It has been fun getting the bots to follow me about. They dart in then move away and jostle for position to get a good shot.
I also like the way that when they don't have a target they resort to the pathfinding to get back to their previous task.
I took some pleasure when I led them all to the far side of the map then ran away from them. They turned round at different times and eventually all worked their way back across the map to where they started.
If you have read my previous comments about pathfinding you'll know I was having performance problems with this. The basic pathfinding is unchanged. I did as I expected and have pre-calculated all the paths that I know before the game starts. These are saved with the map. All other paths needed are calculated during the game.
I use one hardware thread (on the Xbox 360) for any pathfinding requested and another hardware thread for all of the rest of the AI. I had to do this just in case working out any one path took too long. I did not want the reactions or behaviour to be held up. So far it's worked well.
Sunday, 13 June 2010
Artificial Intelligence
The very short attached video shows the initial AI that I have added that makes the characters follow members of other teams.
==
The AI code used in that video is no longer used in the game.
==
The AI code used in that video is no longer used in the game.
Wednesday, 9 June 2010
Pathfinding
Over the weekend I was working on pathfinding. I'd already done some research and A* (A-star) pathfinding sounded to be exactly what I needed.
The code was fairly easy to design a basic solution and from the word go I had included a weighting system for squares I wanted bots to prefer. Such as near to cover.
Modifying the map file to include the weighting values took me longer to implement than the pathfinding.
The bad news. Even on the PC pathfinding took much longer than I had anticipated. At first I thought it wasn't working but when I left it 5 minutes it did calculate the paths. The problem was the first path I had given it was very long and it exceeded the 90,000 iterations I had set as my limit. I always add a limit when I use a while() to avoid endless loops!
I added some quick fix optimisation to my code. The first being to remove the closed list because it is unnecessary. A closed marker is more efficient.
At the moment I have also limited how many items it will check on the open list. The disadvantage is that on longer routes I may not get the best path, just any path!
I had also made some errors with the weighting levels I had set. These took some experimentation to sort out. Initially I had made the weights far too high and the paths got driven in to the wrong areas making them unnecessarily long!
At the moment on the PC, all my test paths now calculate quickly enough that you cannot notice unfortunately on the XBox 360 there are short pauses whenever a new path is needed! I'm already using a dedicated hardware thread on an otherwise unused core, just for the pathfinding!
That's where I'm at. I intend to pre-calculate as many paths as I can and I expect that will be sufficient but I am still researching and thinking, more than coding, on this bit.
Tuesday, 25 May 2010
Gamma
Yesterday's post about sound reminded me of the problems I had with gamma correction. Getting on for a year ago I decided to create all the menus. Mainly so I didn't leave it to the end and rush them.
I am glad I did because there is a lot of fiddling about to create each screen. Nothing difficult but still time consuming.
I created a screen to adjust the volume levels of the music and effects separately. The levels are easy to impliment using XACT but the form took a while to get all the sliders drawn and working.
Anyone who has done any windows programming will be used to having a whole host of controls to just drag and drop on to a form. Then you write the code behind it. In game development targeted at anything other than Windows you need to create all the controls you want to use yourself.
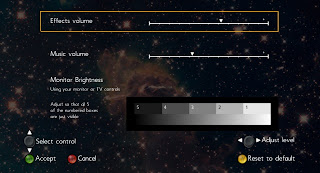
In the above form you'll note a rather wordy description of how to adjust the contrast and brightness. This manual solution was the end result of spending ages trying to find a way to set the gamma levels on a graphics card.
I eventually failed. On all the PC's I tried changes to the gamma settings resulted in nothing at all happening. When I tried this same code on an Xbox I got a black screen.
My alternate to the manual solution would be code all my shaders to include an adjustment to the lighting value. I have decided that there are many other areas of the game far more important and as yet I have not seen an Indie game solve this, so I am at least no worse than others.
I will probably simply remove the note and the contrast bar from the finished game.
I am glad I did because there is a lot of fiddling about to create each screen. Nothing difficult but still time consuming.
I created a screen to adjust the volume levels of the music and effects separately. The levels are easy to impliment using XACT but the form took a while to get all the sliders drawn and working.
Anyone who has done any windows programming will be used to having a whole host of controls to just drag and drop on to a form. Then you write the code behind it. In game development targeted at anything other than Windows you need to create all the controls you want to use yourself.

In the above form you'll note a rather wordy description of how to adjust the contrast and brightness. This manual solution was the end result of spending ages trying to find a way to set the gamma levels on a graphics card.
I eventually failed. On all the PC's I tried changes to the gamma settings resulted in nothing at all happening. When I tried this same code on an Xbox I got a black screen.
My alternate to the manual solution would be code all my shaders to include an adjustment to the lighting value. I have decided that there are many other areas of the game far more important and as yet I have not seen an Indie game solve this, so I am at least no worse than others.
I will probably simply remove the note and the contrast bar from the finished game.
Monday, 24 May 2010
Sounds
I got side tracked again. I was bored play testing in silence so I have added gun shot sounds. I already had music for the menus and a click for menu choices, so I was not starting from scratch.
Basic sounds fitted in nicely. I already had enough code to display a decal when the round hits a structure. That same code path was perfect for putting in the play command for a sound and storing what sound each round made, both at the muzzle and upon impact of an object.
The problems came when making them 3D! Sounds further away need to sound quieter. There is an Apply3D method but to go with it I had to learn how to set this up in XACT. Not as difficult as I thought, but getting it right for my scale, 1 unit = 1m, took some tweeking.
The other problem I have is that for some reason the 3D sounds don't work on my main development PC but are clearly audible on the 360 and on my secondary PC. Odd but it just means I have to test more frequently on the Xbox.
The bit I don't like is that XACT still creates a tiny bit of garbage. I'd avoided the obvious areas but eventually after lots of searches on forums decided the last bit of garbage is unavoidable. Garbage is any object that uses memory on the heap and then needs disposing of during the game. It can interrupt game play. My aim is to avoid any garbage collection during a normal game. My target is 10 minutes between garbage collections.
At the moment I am well within target so I've added sound to my list of areas that create some garbage. It's a short list because the only other thing on it is particle emitters. I'm sure I'll come back to that when I decide I must reduce garbage further.
Back to animating my alien character.
Tuesday, 20 April 2010
Web Site
My wife created the logo yesterday and I got it on to the web site last night.

At the moment the only content is this blog. The background image and others in the game are from the Hubble Space Telescope thanks to NASA and STScI.

At the moment the only content is this blog. The background image and others in the game are from the Hubble Space Telescope thanks to NASA and STScI.
Thursday, 15 April 2010
Named the game
Over the weekend the game got a name. 'Diabolical: The Shooter'.
It's not easy to tell from the current screenshots that this will be a Science Fiction game, so I thought it worth describing the game concept.
It's set in a future where humans have travelled between stars and set up outposts and cities on remote worlds, where we have encountered a small number of other intelligent races.
The premise of this game is that human nature does not change. We still work and fight to get more of what we want. On the outer reaches there are few governments and corporations have a free hand to do business as they please. Humans, however, were not the first race to travel through space. There was a long dead ancient civilization spread through the galaxy. Anything to do with that ancient civilisation can easily be sold to the highest bidder and there is strong competition to get artifacts.
Back to what I've been doing...
I was intending to do the artwork myself but after spending far more time than I could spare to create one small object. I decided that if the game is ever to be finished to the quality I would like, then I need to get an artist to create the key assets.
I have found some off the shelf models for some characters and most of the scenery but the game needs to be unique so I commissioned a 3D model a week ago and the result is back. It is exactly what I was after. I need to do some more work before I will present it.
My main focus at the moment is map design, although I get side tracked when I need to add new features to the level editor. Things like a model to represent the spawn points or a grid to help position structures.
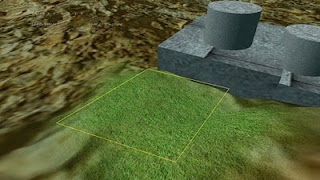
I've also improved the random noise and terrain smoothing functions and added a rectangular cursor which is useful for man made shapes like roads.
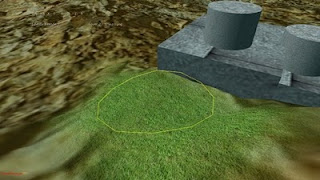
The circular one is best for hills and natural terrain.
It's not easy to tell from the current screenshots that this will be a Science Fiction game, so I thought it worth describing the game concept.
It's set in a future where humans have travelled between stars and set up outposts and cities on remote worlds, where we have encountered a small number of other intelligent races.
The premise of this game is that human nature does not change. We still work and fight to get more of what we want. On the outer reaches there are few governments and corporations have a free hand to do business as they please. Humans, however, were not the first race to travel through space. There was a long dead ancient civilization spread through the galaxy. Anything to do with that ancient civilisation can easily be sold to the highest bidder and there is strong competition to get artifacts.
Back to what I've been doing...
I was intending to do the artwork myself but after spending far more time than I could spare to create one small object. I decided that if the game is ever to be finished to the quality I would like, then I need to get an artist to create the key assets.
I have found some off the shelf models for some characters and most of the scenery but the game needs to be unique so I commissioned a 3D model a week ago and the result is back. It is exactly what I was after. I need to do some more work before I will present it.
My main focus at the moment is map design, although I get side tracked when I need to add new features to the level editor. Things like a model to represent the spawn points or a grid to help position structures.

I've also improved the random noise and terrain smoothing functions and added a rectangular cursor which is useful for man made shapes like roads.

The circular one is best for hills and natural terrain.
First Images
Originally posted: 23 Feb.2010
These are the first images of the engine in development.
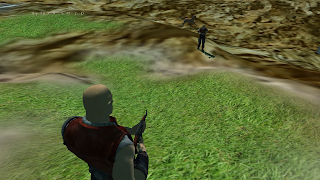
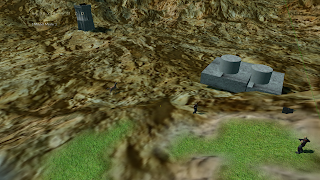
Please do not judge it yet. This is not even alpha code. I've been working on this in my spare time since March 2009. That's when I started with XNA and very shortly after had to learn a little bit of Blender to get some models in to a scene. The XNA dude shown in the screenshots is not the original from the skinning sample.
It is a duplicate transfered to Blender so I could add additional animations.
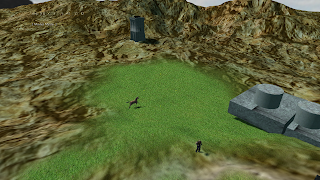
The first area I tackled was shadows however that took a lot longer than I expected. The shadows are still not finished.
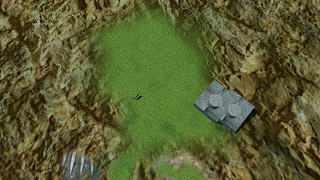
The terrain editor is a very recent addition which only took a few days to complete.
These are the first images of the engine in development.


Please do not judge it yet. This is not even alpha code. I've been working on this in my spare time since March 2009. That's when I started with XNA and very shortly after had to learn a little bit of Blender to get some models in to a scene. The XNA dude shown in the screenshots is not the original from the skinning sample.
It is a duplicate transfered to Blender so I could add additional animations.

The first area I tackled was shadows however that took a lot longer than I expected. The shadows are still not finished.

The terrain editor is a very recent addition which only took a few days to complete.
Wednesday, 14 April 2010
New blog set up
Originally I was using a web site but that was slow to manage so I've resorted to a free blog.
Any posts dated prior to this one have been moved from the previous web site.
Any posts dated prior to this one have been moved from the previous web site.
Wednesday, 10 February 2010
Another way to find your XNA Garbage
Like most people developing using XNA for the Xbox 360 eventually I encountered the frustrating situation where every minute or so my game froze for a few moments. With only the minimal of investigation the term Garbage Collection came to my attention.
What is garbage collection?
Garbage collection is the process used to remove unassociated items from the memory heap of the computer or console. This is necessary to make best use of the limited memory resources on the machine. What adds to the heap is outside the scope of this article but as a quick rule of thumb anything that needs a new statement infront of it will add to the heap.
The garbage collection process on a Windows PC is typically non-intrusive however the one on the Xbox 360 has a noticable impact on performance. We are therefore only talking about Xbox 360 garbage collection. It's worth noting that memory measurements on the PC are going to indicate the same areas of code using memory, so we can still debug garbage collection using the PC.
Garbage collection on the Xbox 360 happens when the heap has grown by 1M Bytes since the last garbage collection. If you can write your programme so the heap never grows that large during the game play, you will never notice garbage collection.
Memory usage is not a crime!
Before we go too far it is worth pointing out that all programmes NEED to use memory and the heap will always grow. It is usually many megabytes in size depending on the objects used in your programme. The heap is NOT garbage.
Many people also confuse memory usage with a memory leak. A memory leak is where your code continues to use more and more memory without releasing it for reuse when it is no longer needed.
Your programme will use memory and that memory usage may grow while the programme is running but that is not a memory leak. As we are talking about XNA which uses .NET which is managed code it is extremely unlikely that you could even accidentally cause a memory leak. That is one of the reasons for using a managed architecture like .NET because it deals with tidying up the memory you are using. It does that with the garbage collection process.
What is garbage then?
Garbage is made up of objects on the heap that we no longer need. More specifically items that are no longer linked to any active part of our code. Typically these are objects we create, use and discard. One common way to avoid garbage collection is to reuse objects rather than discard them. However this article is not how to get rid of the garbage but to show where the garbage is being created.
To find out about how to avoid garbage have a look at this article on the blog by Mike B. McLaughlin.
How can we tell where my code leaves stuff on the heap?
The typical way to find out what any programme is doing is to use a profiler. Two common ones for XNA are, the CLR Profiler and nProf. Both of these will provide loads of statistics to show you what your programme is doing while it is running. These should be your first port of call when you have a performance shortfall with your game.
Is there another way to measure the garbage?
There are times when for one reason or another a profiler does not give the information you need in the way you need it. As an example, and the reason I use an alternate solution, is because sometimes the CLR Profiler will not run with a particular programme. It just doesn't and no one can adequately explain why.
Rather than use an external tool to measure the memory usage we can build it in to our programme. That's the method I am demonstrating here.
The most significant part of the code simply measures the memory usage at a point in time and calculates the difference between that and the last measurement. The number recorded is the growth in memory during that update cycle.
If the total memory used has gone down there must have been a garbage collection process between the last update and this update. Therefore I set all the counters back to zero.
As mentioned above there is nothing wrong with memory usage, that is normal. All classes will use memory when they are created but what we are looking for is continuous growth.
I have created a class with the above methods in and just add that in to my code between compiler directives.
How do we see what is going on?
Finally I needed a way to output the information without creating garbage! This is trickier than it sounds because any string manipulation will create garbage. Even adding a number to the end of a line of text or just changing that number will add a significant amount to the heap!
The solution is to do everything graphically. I use the name of the class followed by a tiny line graph showing the growth of the memory used since the last garbage collection. There are three lines because I have allowed for three separate measurements within any class. I deliberately put the graphs outside the title safe area because I don't want them to get in the way of play testing the game.
Somewhere in your game, probably in your central controlling class, the Draw(...) call for the garbage tool needs to be added to include all the classes you have added the measurements to. I have created a base class for most of my classes which includes the various garbage bits. I can then simply add a block of code to the end of my classes which call any sub classes as part of their DrawGarbage(...) method.
That's it. Once the GarbageTool has been added to a class just use the Before(0) and After(0) calls round any code you want to measure.
I use this to reduce my garbage creation to very nearly nothing and avoid garbage collections during game play.
Download Source Code
XNA Garbage helper classes (4kb) Feb. 2010
What is garbage collection?
Garbage collection is the process used to remove unassociated items from the memory heap of the computer or console. This is necessary to make best use of the limited memory resources on the machine. What adds to the heap is outside the scope of this article but as a quick rule of thumb anything that needs a new statement infront of it will add to the heap.
The garbage collection process on a Windows PC is typically non-intrusive however the one on the Xbox 360 has a noticable impact on performance. We are therefore only talking about Xbox 360 garbage collection. It's worth noting that memory measurements on the PC are going to indicate the same areas of code using memory, so we can still debug garbage collection using the PC.
Garbage collection on the Xbox 360 happens when the heap has grown by 1M Bytes since the last garbage collection. If you can write your programme so the heap never grows that large during the game play, you will never notice garbage collection.
Memory usage is not a crime!
Before we go too far it is worth pointing out that all programmes NEED to use memory and the heap will always grow. It is usually many megabytes in size depending on the objects used in your programme. The heap is NOT garbage.
Many people also confuse memory usage with a memory leak. A memory leak is where your code continues to use more and more memory without releasing it for reuse when it is no longer needed.
Your programme will use memory and that memory usage may grow while the programme is running but that is not a memory leak. As we are talking about XNA which uses .NET which is managed code it is extremely unlikely that you could even accidentally cause a memory leak. That is one of the reasons for using a managed architecture like .NET because it deals with tidying up the memory you are using. It does that with the garbage collection process.
What is garbage then?
Garbage is made up of objects on the heap that we no longer need. More specifically items that are no longer linked to any active part of our code. Typically these are objects we create, use and discard. One common way to avoid garbage collection is to reuse objects rather than discard them. However this article is not how to get rid of the garbage but to show where the garbage is being created.
To find out about how to avoid garbage have a look at this article on the blog by Mike B. McLaughlin.
How can we tell where my code leaves stuff on the heap?
The typical way to find out what any programme is doing is to use a profiler. Two common ones for XNA are, the CLR Profiler and nProf. Both of these will provide loads of statistics to show you what your programme is doing while it is running. These should be your first port of call when you have a performance shortfall with your game.
Is there another way to measure the garbage?
There are times when for one reason or another a profiler does not give the information you need in the way you need it. As an example, and the reason I use an alternate solution, is because sometimes the CLR Profiler will not run with a particular programme. It just doesn't and no one can adequately explain why.
Rather than use an external tool to measure the memory usage we can build it in to our programme. That's the method I am demonstrating here.
The most significant part of the code simply measures the memory usage at a point in time and calculates the difference between that and the last measurement. The number recorded is the growth in memory during that update cycle.
// Call these before and after the method that we want to measure
public void Before(int pair)
{
 memBefore[pair] = System.GC.GetTotalMemory(false);
}

public void After(int pair)
{
 memAfter[pair] = System.GC.GetTotalMemory(false);
 CalcMemUsed(pair);
}

private void CalcMemUsed(int pair)
{
 long diff = memAfter[pair] - memBefore[pair];
 // Cumulative
 memUsedAllPasses[pair] += diff;
 if (diff > memUsedEachPass[pair])
 {
  memUsedEachPass[pair] = diff;
 }
 if (memUsedAllPasses[pair] < 0)
 {
  memUsedAllPasses[pair] = 0;
 }
 MeasureMemoryNow(pair);
}

private void MeasureMemoryNow(int pair)
{
 if (memAfter[pair] < memPrevious[pair])
 {
  // Set this level as the base to count from
  memLowest = memAfter[pair];
  // Clear other counters
  memUsedEachPass[pair] = 0;
  memUsedAllPasses[pair] = 0;
 }
 memPrevious[pair] = memAfter[pair];
 memGrowth = memAfter[pair] - memLowest;
}
If the total memory used has gone down there must have been a garbage collection process between the last update and this update. Therefore I set all the counters back to zero.
As mentioned above there is nothing wrong with memory usage, that is normal. All classes will use memory when they are created but what we are looking for is continuous growth.
I have created a class with the above methods in and just add that in to my code between compiler directives.
#if DEBUG
 // fixed location at the top left
 Garbage = new GarbageTools(ShorterClassName(this.GetType().ToString()),
  new Vector2(5, 5));
#endif
How do we see what is going on?
Finally I needed a way to output the information without creating garbage! This is trickier than it sounds because any string manipulation will create garbage. Even adding a number to the end of a line of text or just changing that number will add a significant amount to the heap!
The solution is to do everything graphically. I use the name of the class followed by a tiny line graph showing the growth of the memory used since the last garbage collection. There are three lines because I have allowed for three separate measurements within any class. I deliberately put the graphs outside the title safe area because I don't want them to get in the way of play testing the game.
private const float lineThickness = 2f;
public const float maxScale = 550f;
public const float maxMainValue = 2600000f;
private const long warnByteLevel = 100;
private const long warnEachLarge = 2000;

// This must be inside an existing SpriteBatch.Begin() End() pair
public void Draw(SpriteBatch spriteBatch, SpriteFont spriteFont, Texture2D imagePixel)
{
 if (memUsedAllPasses[0] > warnByteLevel || memUsedAllPasses[1] > warnByteLevel)
 {
  Color colour = Color.Green;
  if (memUsedEachPass[0] > warnEachLarge || memUsedEachPass[1] > warnEachLarge)
  {
   colour = Color.Red;
  }
  spriteBatch.DrawString(spriteFont, className, positionText, colour);
  // Graph
  positionGraph.X = positionText.X + spriteFont.MeasureString(className).X;
  positionGraph.Y = positionText.Y + ((spriteFont.MeasureString(className).Y) * 0.5f) - lineThickness - lineThickness;
  // Same scale as the DebugMessages
  colour = Color.Orange;
  float lineLength = (float)memUsedAllPasses[0] / maxMainValue * maxScale;
  spriteBatch.Draw(imagePixel, positionGraph, null, colour, 0, Vector2.Zero,
    new Vector2(lineLength, lineThickness), SpriteEffects.None, 0);
  positionGraph.Y += lineThickness + 1;
  colour = Color.Violet;
  lineLength = (float)memUsedAllPasses[1] / maxMainValue * maxScale;
  spriteBatch.Draw(imagePixel, positionGraph, null, colour, 0, Vector2.Zero,
    new Vector2(lineLength, lineThickness), SpriteEffects.None, 0);
  positionGraph.Y += lineThickness + 1;
  colour = Color.Purple;
  lineLength = (float)memUsedAllPasses[2] / maxMainValue * maxScale;
  spriteBatch.Draw(imagePixel, positionGraph, null, colour, 0, Vector2.Zero,
    new Vector2(lineLength, lineThickness), SpriteEffects.None, 0);
 }
}
Somewhere in your game, probably in your central controlling class, the Draw(...) call for the garbage tool needs to be added to include all the classes you have added the measurements to. I have created a base class for most of my classes which includes the various garbage bits. I can then simply add a block of code to the end of my classes which call any sub classes as part of their DrawGarbage(...) method.
#region GARBAGE
#if DEBUG
// This is the same in each class
// Override and call the base then add other classes where necessary
public override void DrawGarbage(SpriteBatch spriteBatch, SpriteFont spriteFont, Texture2D imagePixel)
{
 // Draw our own first
 base.DrawGarbage(spriteBatch, spriteFont, imagePixel);
 // Add any other classes here
 // ...
 for (int i = 0; i < controllers.Count; i++)
 {
  controllers[i].DrawGarbage(spriteBatch, spriteFont, imagePixel);
 }

}
#endif
#endregion
That's it. Once the GarbageTool has been added to a class just use the Before(0) and After(0) calls round any code you want to measure.
public override void Update(GameTime gameTime)
{
 base.Update(gameTime);
#if DEBUG
 Garbage.Before(0);
#endif

 // Do normal game stuff here and the memory usage will be measured
 // ...

#if DEBUG
 Garbage.After(0);
#endif
}
I use this to reduce my garbage creation to very nearly nothing and avoid garbage collections during game play.
Download Source Code
XNA Garbage helper classes (4kb) Feb. 2010
Friday, 5 February 2010
XNA Triangle Intersections to Ray and Sphere
I have converted examples of Ray to Triangle and BoundingSphere to Triangle intersections available on the Internet in to a XNA C# triangle class. It also includes a few other triangle related methods.
Download Source Code
Triangle XNA class (4kb) Feb. 2010
The triangle uses an array of Vector3's for the corner points.
The Intersect Ray method is from the Creators club picking with triangle accuracy sample.
The Triangle to sphere intersection is an expensive test compared to other intersections. I only use it to create level files. I do not use it in game.
A good source of intersection code mainly in C/++ and theoretical papers is available from: realtimerendering.com
To get the vertices and triangles from an XNA model:
using XNA 3.1 is available from enchantedage.com
using XNA 4.0 I have a modified version of the above here.
Download Source Code
Triangle XNA class (4kb) Feb. 2010
The triangle uses an array of Vector3's for the corner points.
public Triangle()
{
 Vertex = new Vector3[3];
 Vertex[0] = Vector3.Zero;
 Vertex[1] = Vector3.Zero;
 Vertex[2] = Vector3.Zero;
}
The Intersect Ray method is from the Creators club picking with triangle accuracy sample.
// Returns the distance from the origin of the ray to the intersection with
// the triangle, null if no intersect and negative if behind.
public void Intersects(ref Ray ray, out float? distance)
{
 // Set the Distance to indicate no intersect
 distance = null;
 // Compute vectors along two edges of the triangle.
 Vector3 edge1, edge2;

 Vector3.Subtract(ref Vertex[2], ref Vertex[1], out edge1);
 Vector3.Subtract(ref Vertex[0], ref Vertex[1], out edge2);

 // Compute the determinant.
 Vector3 directionCrossEdge2;
 Vector3.Cross(ref ray.Direction, ref edge2, out directionCrossEdge2);

 float determinant;
 Vector3.Dot(ref edge1, ref directionCrossEdge2, out determinant);

 // If the ray is parallel to the triangle plane, there is no collision.
 if (determinant > -float.Epsilon && determinant < float.Epsilon)
 {
  return;
 }

 float inverseDeterminant = 1.0f / determinant;

 // Calculate the U parameter of the intersection point.
 Vector3 distanceVector;
 Vector3.Subtract(ref ray.Position, ref Vertex[1], out distanceVector);

 float triangleU;
 Vector3.Dot(ref distanceVector, ref directionCrossEdge2, out triangleU);
 triangleU *= inverseDeterminant;

 // Make sure it is inside the triangle.
 if (triangleU < 0 || triangleU > 1)
 {
  return;
 }

 // Calculate the V parameter of the intersection point.
 Vector3 distanceCrossEdge1;
 Vector3.Cross(ref distanceVector, ref edge1, out distanceCrossEdge1);

 float triangleV;
 Vector3.Dot(ref ray.Direction, ref distanceCrossEdge1, out triangleV);
 triangleV *= inverseDeterminant;

 // Make sure it is inside the triangle.
 if (triangleV < 0 || triangleU + triangleV > 1)
 {
  return;
 }

 // == By here the ray must be inside the triangle

 // Compute the distance along the ray to the triangle.
 float length = 0;
 Vector3.Dot(ref edge2, ref distanceCrossEdge1, out length);
 distance = length * inverseDeterminant;
}
The Triangle to sphere intersection is an expensive test compared to other intersections. I only use it to create level files. I do not use it in game.
// This is an expensive test.
// The result is true or false.
public void Intersects(ref BoundingSphere sphere, out bool result)
{
 result = false;
 // First check if any corner point is inside the sphere
 // This is necessary because the other tests can easily miss
 // small triangles that are fully inside the sphere.
 if (sphere.Contains(A) != ContainmentType.Disjoint ||
  sphere.Contains(B) != ContainmentType.Disjoint ||
  sphere.Contains(C) != ContainmentType.Disjoint)
 {
  // A point is inside the sphere
  result = true;
  return;
 }
 // Test the edges of the triangle using a ray
 // If any hit then check the distance to the hit is less than the length of the side
 // The distance from a point of a small triangle inside the sphere coule be longer
 // than the edge of the small triangle, hence the test for points inside above.
 Vector3 side = B - A;
 // Important:  The direction of the ray MUST
 // be normalised otherwise the resulting length
 // of any intersect is wrong!
 Ray ray = new Ray(A, Vector3.Normalize(side));
 float distSq = 0;
 float? length = null;
 sphere.Intersects(ref ray, out length);
 if (length != null)
 {
  distSq = (float)length * (float)length;
  if (length > 0 && distSq < side.LengthSquared())
  {
   // Hit edge
   result = true;
   return;
  }
 }
 // Stay at A and change the direction to C
 side = C - A;
 ray.Direction = Vector3.Normalize(side);
 length = null;
 sphere.Intersects(ref ray, out length);
 if (length != null)
 {
  distSq = (float)length * (float)length;
  if (length > 0 && distSq < side.LengthSquared())
  {
   // Hit edge
   result = true;
   return;
  }
 }
 // Change to corner B and edge to C
 side = C - B;
 ray.Position = B;
 ray.Direction = Vector3.Normalize(side);
 length = null;
 sphere.Intersects(ref ray, out length);
 if (length != null)
 {
  distSq = (float)length * (float)length;
  if (length > 0 && distSq < side.LengthSquared())
  {
   // Hit edge
   result = true;
   return;
  }
 }
 // If we get this far we are not touching the edges of the triangle

 // Calculate the InverseNormal of the triangle from the centre of the sphere
 // Do a ray intersection from the centre of the sphere to the triangle.
 // If the triangle is too small the ray could miss a small triangle inside
 // the sphere hence why the points were tested above.
 ray.Position = sphere.Center;
 // This will always create a vector facing towards the triangle from the
 // ray starting point.
 InverseNormal(ref ray.Position, out side);
 ray.Direction = side;
 Intersects(ref ray, out length);
 if (length != null && length > 0 && length < sphere.Radius)
 {
  // Hit the surface of the triangle
  result = true;
  return;
 }
 // Only if we get this far have we missed the triangle
 result = false;
}
A good source of intersection code mainly in C/++ and theoretical papers is available from: realtimerendering.com
To get the vertices and triangles from an XNA model:
using XNA 3.1 is available from enchantedage.com
using XNA 4.0 I have a modified version of the above here.
Subscribe to:
Posts (Atom)


