I received an e-mail today that got me interesting in my game again.
Too much of my time was spent tinkering with animations and controls to try to get things just right. I've looked at some pre-built assets before but none quite hit the mark.
Ultimate FPS (UFPS) have added a third person view and are now adding multi-player. Both those features are exactly what I have been waiting for. They have teamed up with Photon Unity Networking (PUN) which is my multi-player platform of choice so I am already familiar with that.
http://forum.unity3d.com/threads/ufps-ultimate-fps-50-off-sale.126886/
https://www.assetstore.unity3d.com/en/#!/content/2943
https://www.exitgames.com/en/PUN
It's a closed Beta at the moment but this looks to be exactly what I need to speed up my development:
http://www.visionpunk.com/content/assets/ufpsmp/landing.html
1000's of hours have gone in to UFPS which I would never have time to replicate and so I am very hopeful that all I need to do is add in my gamepad support and some AI and the rest will be level design and assets to complete the game. Sounds easy but I know there is still a lot of work left to do.
Coming up to the Christmas break I might even have some time to work on it.
Fingers crossed that they let me in on the Beta.
Showing posts with label Unity3D. Show all posts
Friday, 12 December 2014
Monday, 14 July 2014
The Importance of Nothing
Just a quick tip for this article.
I have a lot of layers in my Unity Mecanim Controller which I turn on and off as needed by setting the weight to one and then usually fade that back out to zero when no longer needed. The layers are typically for upper body only movements like reloading or throwing.
I had struggled with unexpected jerky starts when the layer was enabled.
I eventually realised that there is a mandatory default animation on each layer. In the layers where it was useful to transition from Any State, the behaviour of the controller is to immediately start the default state, which causes the jump and then start the transition from that incorrect state to the desired state.
Armed with that information I simply added a default state that does not have an animation. It does nothing and has no transitions but that fixed it.
I have a lot of layers in my Unity Mecanim Controller which I turn on and off as needed by setting the weight to one and then usually fade that back out to zero when no longer needed. The layers are typically for upper body only movements like reloading or throwing.
I had struggled with unexpected jerky starts when the layer was enabled.
I eventually realised that there is a mandatory default animation on each layer. In the layers where it was useful to transition from Any State, the behaviour of the controller is to immediately start the default state, which causes the jump and then start the transition from that incorrect state to the desired state.
Armed with that information I simply added a default state that does not have an animation. It does nothing and has no transitions but that fixed it.
Wednesday, 25 June 2014
Mecanim Animations
I have been working on moving about the game and getting the animations in place for the actions I will need.
The advantage of Unity is there are lots of pre-produced kits to use. Some free but most have a small amount to pay. I have been working on the in-game movement. I have tried lots of the free packages, used most of the tutorials and purchased a lot of animations at modest prices.
I have found that the Unity Mecanim system is very powerful. It has some great advantages, like being able to re-task animations from one model to another. Like any complex system, getting the best out of Mecanim is still time consuming.
None of the assets I tried or purchased had a control system or set of animations that completely suited how I wanted Diabolical to behave. I have therefore created the input controller and the Mecanim controller almost from scratch.
I created myself a test environment using bits and pieces from the assets I purchased and some of the tutorials. This made it easy to test changes.
Some of the best animations I purchased were designed for root motion as are most of the latest Unity tech demos. Root motion is where the animation moves the character within the world. This leads to a much better looking result. The trouble I found was that I could not get it to feel like a first person game. It felt like watching a third person. For example, instead of the animation moving as quickly as the player input round a corner, there was a nice looking smooth curve but not quite what the player controls were doing.
Diabolical is an over the shoulder game, so although the view is third person the controls should feel like a first person game.
If I had more time or lots of people to work on it, I am sure root motion can be used to produce a good feeling and good looking first person solution, unfortunately I have neither the time nor the people, it's just me. I have opted for the more traditional route of the input directly moving the player entity and the animations doing a best approximation of the movement to get there.
You end up with feet sliding and perhaps the odd lag in the animation but to me the movement feels better from a players perspective.
It's taken a few weeks and I've had a few frustrating days in that time but I am now happy with the result.
I have more and better animations than I had in the XNA version. In Unity I already have rifle and pistol aiming up and down, walking, running, jumping, shooting and reloading. I just need to add throwing grenades and I am done with this bit.
The advantage of Unity is there are lots of pre-produced kits to use. Some free but most have a small amount to pay. I have been working on the in-game movement. I have tried lots of the free packages, used most of the tutorials and purchased a lot of animations at modest prices.
I have found that the Unity Mecanim system is very powerful. It has some great advantages, like being able to re-task animations from one model to another. Like any complex system, getting the best out of Mecanim is still time consuming.
None of the assets I tried or purchased had a control system or set of animations that completely suited how I wanted Diabolical to behave. I have therefore created the input controller and the Mecanim controller almost from scratch.
I created myself a test environment using bits and pieces from the assets I purchased and some of the tutorials. This made it easy to test changes.
Some of the best animations I purchased were designed for root motion as are most of the latest Unity tech demos. Root motion is where the animation moves the character within the world. This leads to a much better looking result. The trouble I found was that I could not get it to feel like a first person game. It felt like watching a third person. For example, instead of the animation moving as quickly as the player input round a corner, there was a nice looking smooth curve but not quite what the player controls were doing.
Diabolical is an over the shoulder game, so although the view is third person the controls should feel like a first person game.
If I had more time or lots of people to work on it, I am sure root motion can be used to produce a good feeling and good looking first person solution, unfortunately I have neither the time nor the people, it's just me. I have opted for the more traditional route of the input directly moving the player entity and the animations doing a best approximation of the movement to get there.
You end up with feet sliding and perhaps the odd lag in the animation but to me the movement feels better from a players perspective.
It's taken a few weeks and I've had a few frustrating days in that time but I am now happy with the result.
I have more and better animations than I had in the XNA version. In Unity I already have rifle and pistol aiming up and down, walking, running, jumping, shooting and reloading. I just need to add throwing grenades and I am done with this bit.
Monday, 12 May 2014
Blender to Mixamo to Blender to Unity
As with all 3D modelling one of the biggest problems is transferring models between applications and still retain all the details.
The following is what works for me to get a mesh modeled in Blender 2.70a in to Mixamo to create the rig and then back in to Blender and on in to Unity 4.3 still in a state to animate.
You may not need to get your model back in to Blender but I need to add some simple animations not available from Mixamo yet.
Blender to Mixamo
Export from Blender using the FBX exporter that ships with Blender 2.70a.
You only need the mesh but the settings matter little. Mixamo appears to sort out most things. I used the defaults of -Z Forward and +Y Up. I do change the Path Mode to 'Strip Path' so the FBX expects the texture file in the same folder as the FBX file.
Compress the FBX file and the texture file in to a zip file and upload just that Zip file in to the Rig upload of Mixamo.
It took me several variations of file types before I worked out the above that worked. Even the zip file was a problem. For some reason a zip file created with 7zip did not work but a zip created with WinRar did.
Once in Mixamo the Auto-Rigging worked very well. Mixamo does a much better job of weight painting than I can manage.
The next trouble was exporting in a format that I could read back in to Blender.
Mixamo To Blender
I found the standard Collada worked with Blender 2.70a, not the version for use with the older version of Blender.
I added the T-pose animation and downloaded it as a zipped Collada file.
I then imported that in to Blender using the Collada (Default) importer shipped with version 2.70a of Blender.
I never understand why most importers change the scale to 0.01.
I simply change the scale for all three axes back to 1.0 and the model and the armature are as I expect.
I downloaded a version with an Idle animation and that worked as well.
Blender to Unity
Blender to Unity poses few problems. Export to FBX and drag in to Unity.
Again I use the standard settings in Blender, I only include the Armature and Mesh and change the Path Mode to 'Strip Path'.
In Unity, drag the FBX file exported from Blender in to a folder in Unity.
The model imports face down but the armature and animation will make the model face the correct way up without having to rotate the imported mesh.
Like other importers Unity also imports at a scale of 0.01 so it needs to be changed to a scale of 1.0.
If necessary drag the texture in and create a material using that then drag the material in to the mesh renderer for the model.
Prepare to Animate
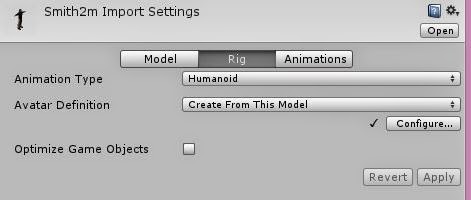
To use any of the animations it will be necessary to configure the Avatar Rig in Unity.
Select the model and press the Rig button.
Change the animation type to Humanoid and press Apply.
The chances are it will work it all out itself but if necessary you can press the configure button.
At this point you should be able to use Mecanim animations on the imported model. Job done.
The following is what works for me to get a mesh modeled in Blender 2.70a in to Mixamo to create the rig and then back in to Blender and on in to Unity 4.3 still in a state to animate.
You may not need to get your model back in to Blender but I need to add some simple animations not available from Mixamo yet.
Blender to Mixamo
Export from Blender using the FBX exporter that ships with Blender 2.70a.
You only need the mesh but the settings matter little. Mixamo appears to sort out most things. I used the defaults of -Z Forward and +Y Up. I do change the Path Mode to 'Strip Path' so the FBX expects the texture file in the same folder as the FBX file.
Compress the FBX file and the texture file in to a zip file and upload just that Zip file in to the Rig upload of Mixamo.
It took me several variations of file types before I worked out the above that worked. Even the zip file was a problem. For some reason a zip file created with 7zip did not work but a zip created with WinRar did.
Once in Mixamo the Auto-Rigging worked very well. Mixamo does a much better job of weight painting than I can manage.
The next trouble was exporting in a format that I could read back in to Blender.
Mixamo To Blender
I found the standard Collada worked with Blender 2.70a, not the version for use with the older version of Blender.
I added the T-pose animation and downloaded it as a zipped Collada file.
I then imported that in to Blender using the Collada (Default) importer shipped with version 2.70a of Blender.
I never understand why most importers change the scale to 0.01.
I simply change the scale for all three axes back to 1.0 and the model and the armature are as I expect.
I downloaded a version with an Idle animation and that worked as well.
Blender to Unity
Blender to Unity poses few problems. Export to FBX and drag in to Unity.
Again I use the standard settings in Blender, I only include the Armature and Mesh and change the Path Mode to 'Strip Path'.
In Unity, drag the FBX file exported from Blender in to a folder in Unity.
The model imports face down but the armature and animation will make the model face the correct way up without having to rotate the imported mesh.
Like other importers Unity also imports at a scale of 0.01 so it needs to be changed to a scale of 1.0.
If necessary drag the texture in and create a material using that then drag the material in to the mesh renderer for the model.
Prepare to Animate
To use any of the animations it will be necessary to configure the Avatar Rig in Unity.
Select the model and press the Rig button.
Change the animation type to Humanoid and press Apply.
The chances are it will work it all out itself but if necessary you can press the configure button.
At this point you should be able to use Mecanim animations on the imported model. Job done.
Friday, 9 May 2014
Head Texture UV Unwrap
I've been working on the controller and animations and this has led me back to character creation.
I have tried creating my own animations and although acceptable they are not as good as those I can purchase for a modest fee for use with the Unity3D Mecanim system.
In the process of trying out the purchased and a few free bundled animations with my own models I have found some shortcomings with my skinning. To fix that I have tried Mixamo. It did a fantastic job of adding a rig and skinning my character.
The test animations also showed where my mesh needed improvement. Before I create a final skinned mesh using Mixamo I decided I should fix the mesh and that led me eventually to recreating the UV map for the characters head.
Texturing a Head
I have never textured a human head before so to remind me of the technique I used I decided to put it down in this blog.
There are loads of tutorials out there for UV mapping and texturing but the two I found most useful are:
For UV unwrapping: http://bgdm.katorlegaz.com/lscm_tute/lscm_tute.htm
For creating the texture for the head: http://www.3dm3.com/tutorials/maya/texturing/
This one also has a fully body tutorial but was also helpful: http://cgi.tutsplus.com/articles/game-character-creation-series-kila-chapter-3-uv-mapping--cg-26754
I am not going to go in to detail because those tutorials do that. I am just going to mention the bits I wanted answers to. The only thing to mention about the tutorials above is that the version of Blender mentioned is an older version. For me the standard Unwrap method created the head UV in one go without any adjustment needed.
Where to create seams?
I decided:
- From just above the hairline back over the head to the back of the neck.
- From under the chin down the centre of the neck at the front
- Across the mouth
- The eyes should be separate and therefore already a hollow cutout
I tried a horizontal cut on the forehead but I found this made it difficult to add hair without a visible line.
Do I separate the ears?
I had seen some examples with the ears being removed and dealt with separately. I tried that and found the joint was visible. For me it works best if I keep the ears attached.
Can I use a downloaded head texture created for another model?
No. I tried adjusting the UV to fit a texture and it did not work. It was stretched and all wrong in places. What worked for me was to create the texture to fit the UV map as generated by Blender. The generated UV has done the maths to minimise stretching.
Basic Technique
Start by exporting the UV map from Blender. You won't get very far unless you know what you are trying to line the texture up with. The exported UV image gives you a semi-transparent texture with lines on to use as a layer in your photo editor.
Creating the finished texture is also all about layers.
I started with a background of skin colour. This was created using photo of a face. Using the clone tool in Gimp I extended the flesh in all directions until I had a rectangle of flesh. The important bit is that it retained tonal variation, so it still looked like skin.
The result was still very rough with duplicated wrinkles and blemishes. I used various blurs and finished with a giant size smudge brush with an opacity of about 60% to end up with an even result.
That skin is the base layer over which everything else is added.
The next layer I created was for the eyes and nose taken from a different photo of a face. I feathered the edge by using a large erase tool with a faded edge. It was deliberately a freehand rough cutout so the blend was more natural. I kept the eye brows as well.
I repeatedly scaled the layer until the eyes lined up with the UV map. I then scaled vertically to get the nose the right length.
I used small clone and smudge brushes with blurred edges to make the area round the eyes redder and remove any overlap of the eye in the photo with the UV map. I then filled in the eyes with the same colour and smoothed the result using the smudge brush.
I smudged out the nostrils from the texture because my model has geometry to form those and it looks odd if the texture does not align with the geometry of the nostrils.
I added a layer for the mouth and adjusted the scale to fit the UV map.
The same with the layer for the ears.
For all the added layers above the skin I set the opacity to 50% so they all blended nicely.
At this point I decided to try it on the model and I am pleased with the results.
I added blemishes and the hair the same way using additional layers.
In my opinion hair looks best as a separate mesh made of strips so the hair in this texture is just a placeholder.
Now that is done I can add the rig and skinning information using Mixamo.
I have tried creating my own animations and although acceptable they are not as good as those I can purchase for a modest fee for use with the Unity3D Mecanim system.
In the process of trying out the purchased and a few free bundled animations with my own models I have found some shortcomings with my skinning. To fix that I have tried Mixamo. It did a fantastic job of adding a rig and skinning my character.
The test animations also showed where my mesh needed improvement. Before I create a final skinned mesh using Mixamo I decided I should fix the mesh and that led me eventually to recreating the UV map for the characters head.
Texturing a Head
I have never textured a human head before so to remind me of the technique I used I decided to put it down in this blog.
There are loads of tutorials out there for UV mapping and texturing but the two I found most useful are:
For UV unwrapping: http://bgdm.katorlegaz.com/lscm_tute/lscm_tute.htm
For creating the texture for the head: http://www.3dm3.com/tutorials/maya/texturing/
This one also has a fully body tutorial but was also helpful: http://cgi.tutsplus.com/articles/game-character-creation-series-kila-chapter-3-uv-mapping--cg-26754
I am not going to go in to detail because those tutorials do that. I am just going to mention the bits I wanted answers to. The only thing to mention about the tutorials above is that the version of Blender mentioned is an older version. For me the standard Unwrap method created the head UV in one go without any adjustment needed.
Where to create seams?
I decided:
- From just above the hairline back over the head to the back of the neck.
- From under the chin down the centre of the neck at the front
- Across the mouth
- The eyes should be separate and therefore already a hollow cutout
I tried a horizontal cut on the forehead but I found this made it difficult to add hair without a visible line.
Do I separate the ears?
I had seen some examples with the ears being removed and dealt with separately. I tried that and found the joint was visible. For me it works best if I keep the ears attached.
Can I use a downloaded head texture created for another model?
No. I tried adjusting the UV to fit a texture and it did not work. It was stretched and all wrong in places. What worked for me was to create the texture to fit the UV map as generated by Blender. The generated UV has done the maths to minimise stretching.
Basic Technique
Start by exporting the UV map from Blender. You won't get very far unless you know what you are trying to line the texture up with. The exported UV image gives you a semi-transparent texture with lines on to use as a layer in your photo editor.
Creating the finished texture is also all about layers.
I started with a background of skin colour. This was created using photo of a face. Using the clone tool in Gimp I extended the flesh in all directions until I had a rectangle of flesh. The important bit is that it retained tonal variation, so it still looked like skin.
The result was still very rough with duplicated wrinkles and blemishes. I used various blurs and finished with a giant size smudge brush with an opacity of about 60% to end up with an even result.
That skin is the base layer over which everything else is added.
The next layer I created was for the eyes and nose taken from a different photo of a face. I feathered the edge by using a large erase tool with a faded edge. It was deliberately a freehand rough cutout so the blend was more natural. I kept the eye brows as well.
I repeatedly scaled the layer until the eyes lined up with the UV map. I then scaled vertically to get the nose the right length.
I used small clone and smudge brushes with blurred edges to make the area round the eyes redder and remove any overlap of the eye in the photo with the UV map. I then filled in the eyes with the same colour and smoothed the result using the smudge brush.
I smudged out the nostrils from the texture because my model has geometry to form those and it looks odd if the texture does not align with the geometry of the nostrils.
I added a layer for the mouth and adjusted the scale to fit the UV map.
The same with the layer for the ears.
For all the added layers above the skin I set the opacity to 50% so they all blended nicely.
At this point I decided to try it on the model and I am pleased with the results.
I added blemishes and the hair the same way using additional layers.
In my opinion hair looks best as a separate mesh made of strips so the hair in this texture is just a placeholder.
Now that is done I can add the rig and skinning information using Mixamo.
Sunday, 27 April 2014
Avoid Photon OnDestroy Warnings
I like my code to compile and run without errors. The Photon Unity Networking (PUN) code did not.
When exiting scenes I would get the following errors for each instantiated object in the level:
I searched the Internet and Exit Games forums but found little help that actually solved the problem. I found plenty of other people reporting the same issue.
I tried reading the PUN documentation but that was unhelpful as were any of the samples that I tried so I experimented.
I now have a work round which avoids the warnings and errors.
I simply include that method before any scene change.
When exiting scenes I would get the following errors for each instantiated object in the level:
OnDestroy for PhotonView View (0)1001 on CharacterPlaceholder(Clone) but GO is still in instantiatedObjects. instantiationId: 1001. Use PhotonNetwork.Destroy().
Failed to 'network-remove' GameObject because it's null.
I searched the Internet and Exit Games forums but found little help that actually solved the problem. I found plenty of other people reporting the same issue.
I tried reading the PUN documentation but that was unhelpful as were any of the samples that I tried so I experimented.
I now have a work round which avoids the warnings and errors.
/// Tidies up before exit from the scene.
/// Attempts to destroy network objects correctly.
/// Pauses the messages while the scene changes.
private static void TidyUpBeforeExit()
{
// Destroy any photonView game objects.
PhotonView[] views =
GameObject.FindObjectsOfType<photonview>();
// Whichever client exits first cannot
// destroy the objects owned by
// another client.
foreach (PhotonView view in views)
{
GameObject obj = view.gameObject;
if (view.isMine)
{
// Clients can destroy their
// own instantiated objects
PhotonNetwork.Destroy (obj);
}
else
{
// Clients cannot destroy objects
// instantiated by other clients.
// This avoids the error by
// removing the instantiated
// object before the network view
// is destroyed
if (PhotonNetwork.
networkingPeer.
instantiatedObjects.
ContainsKey(view.instantiationId))
{
PhotonNetwork.
networkingPeer.
instantiatedObjects.
Remove (view.instantiationId);
}
}
}
// By pausing and starting the
// messages manually I can start
// any client or server in any
// order and all spawn messages
// are retained.
PhotonNetwork.SetSendingEnabled(0, false);
PhotonNetwork.isMessageQueueRunning = false;
}
I simply include that method before any scene change.
Thursday, 24 April 2014
Manual vs Automation
I spent several hours trying to use what I was expecting to be better methods to control spawning character when the level changes in a network game. I'm using the Photon Unity Networks (PUN) methods.
According to the following forum post the automated methods should handle pausing messages when the scene changes.
http://forum.exitgames.com/viewtopic.php?f=17&t=2575
As far as I can tell, they work but the trouble with automation is that it is only useful if the person designing the automation was thinking the same way as you are. In this case, Exit Games were not.
I have a scene selection popup and a lobby scene before the level loads.
The server and the client can sit at that lobby and join the game when they are ready.
By manually controlling the network message flow I can allow the server and the client to join in any order. If I use the automated methods the server must be in the game scene before any of the clients!
The only reason I tried to change to the automated methods was because I was trying to get rid of some annoying PhotonNetworks warning and error log messages whenever I exit a scene.
The automated methods did not fix those either!
Back to finding a fix for the errors!
According to the following forum post the automated methods should handle pausing messages when the scene changes.
http://forum.exitgames.com/viewtopic.php?f=17&t=2575
PhotonNetwork.automaticallySyncScene = true
PhotonNetwork.LoadLevel(...)
As far as I can tell, they work but the trouble with automation is that it is only useful if the person designing the automation was thinking the same way as you are. In this case, Exit Games were not.
I have a scene selection popup and a lobby scene before the level loads.
The server and the client can sit at that lobby and join the game when they are ready.
By manually controlling the network message flow I can allow the server and the client to join in any order. If I use the automated methods the server must be in the game scene before any of the clients!
PhotonNetwork.SetSendingEnabled(0, false);
PhotonNetwork.isMessageQueueRunning = false;
Obviously I prefer my method. I simple disable the messages before loading a level and start them again only when the scene has started and before the spawn message is sent.The only reason I tried to change to the automated methods was because I was trying to get rid of some annoying PhotonNetworks warning and error log messages whenever I exit a scene.
OnDestroy for PhotonView View (0)1001 on CharacterPlaceholder(Clone) but GO is still in instantiatedObjects. instantiationId: 1001. Use PhotonNetwork.Destroy().
Failed to 'network-remove' GameObject because it's null.
The automated methods did not fix those either!
Back to finding a fix for the errors!
Friday, 18 April 2014
Unity Gizmos
I've been using Unity 3D for months now and I somehow missed Gizmos as a concept. I had seen the camera and speaker icons in the editor view but I think I had just assumed they were built in symbols used for built in objects and I had a blind spot towards them.
I now know better. You can easily create your own icons which can be included in the scene. I started using them when I wanted to make spawn points visible in the scene.
It is very easy to attach your icon to any object in a scene and that icon displays over the object.
That works well if you want to mark otherwise invisible points in your scene. An example of this might be waypoints for AI controlled characters.
I prefer to create the Gizmos in code. This adds them to the Gizmos list in the game view.
Creating the Icon
This can be done in any image editor and just needs whatever shape you want with a transparent background.
The image can be any size if you intend to use the default automatic scaling method. For good quality I use anything between 512 and 1024 pixels high or wide images. If you don't use the automatic scaling the image in the 3D scene, at those sizes, is quite small.
I used Inkscape to create the following image.
The important bit to know before you can use the image in your code is that it must be in the special Gizmos folder in Unity.
There can only be one Gizmos folder and it must be in the root of the Assets folder.
If you try to put your icon anywhere else, it will not work as a Gizmo in code.
Using the Icon for Your Object
Well if you can write any Unity code this is the simplest possible. Just add the following in the code for your object or create a small script with this in.
That's it, you now have a Gizmo shown wherever you position that object.
I now know better. You can easily create your own icons which can be included in the scene. I started using them when I wanted to make spawn points visible in the scene.
It is very easy to attach your icon to any object in a scene and that icon displays over the object.
That works well if you want to mark otherwise invisible points in your scene. An example of this might be waypoints for AI controlled characters.
I prefer to create the Gizmos in code. This adds them to the Gizmos list in the game view.
Creating the Icon
This can be done in any image editor and just needs whatever shape you want with a transparent background.
The image can be any size if you intend to use the default automatic scaling method. For good quality I use anything between 512 and 1024 pixels high or wide images. If you don't use the automatic scaling the image in the 3D scene, at those sizes, is quite small.
I used Inkscape to create the following image.
The important bit to know before you can use the image in your code is that it must be in the special Gizmos folder in Unity.
There can only be one Gizmos folder and it must be in the root of the Assets folder.
If you try to put your icon anywhere else, it will not work as a Gizmo in code.
Using the Icon for Your Object
Well if you can write any Unity code this is the simplest possible. Just add the following in the code for your object or create a small script with this in.
/// http://docs.unity3d.com/
/// Documentation/ScriptReference/Gizmos.html
void OnDrawGizmos()
{
// The icon image must be in the
// special folder called 'Gizmos'
// There can only be one Gizmos
// folder in the root of Assets.
Gizmos.DrawIcon (transform.position,
"PersonIcon.png",
true);
}
That's it, you now have a Gizmo shown wherever you position that object.
Saturday, 29 March 2014
Unity Inspector Tool Tips and more
When I started working with Unity 3D I looked up adding tool tips to properties in the inspector. All the results of the searches came with a lot of code and no downloadable simple examples.
I did not spend much time on the subject because I was looking for a quick answer. I was also probably using the wrong search criterion.
Further along I had a more important requirement that I thought was worth coding because it would save me making mistakes when setting up scenes. As a consequence, I have leaned enough, very quickly, to create a simple but effective tool tip option for the properties, visible in the inspector.
I don't know if it is because I am using the latest version 4.3 of Unity but my solution does not need much code. Many of the samples I looked at had huge switch or if statement blocks to allow for different property types. I was able to use a built in method that replicated the default behaviour and allowed me to add the tool tip.
That's it, not much code.
If you don't want to copy and paste, I've included the tool tip code and the code for other property attributes in to a GitHub project called Unity3D Utility Kit.
Download the Utility Kit from:
https://github.com/ThatJCB/Unity3DUtilityKit
The kit includes a test scene to show the usage of the attributes and to prove that they work.
At the moment the property attributes included are:
- A box to display a helpful message, which was my first idea before I got tool tips working.
- The tool tip which displays when the mouse hovers over the label.
- A Regular Expression mask for fields, created by Lasse Järvensivu , many thanks.
- An integer slider that also works with float values to keep whole numbers.
- A divider with an optional heading.
- Scene selection list so you can only enter a scene name that has been included in the build list.
There's some work in progress in there as well and I'll probably add more to the list over time.
That last item, for scene selection, was the reason I started looking at the Property Attributes and Drawers in the first place.
I hope the examples will be useful to others.
I did not spend much time on the subject because I was looking for a quick answer. I was also probably using the wrong search criterion.
Further along I had a more important requirement that I thought was worth coding because it would save me making mistakes when setting up scenes. As a consequence, I have leaned enough, very quickly, to create a simple but effective tool tip option for the properties, visible in the inspector.
I don't know if it is because I am using the latest version 4.3 of Unity but my solution does not need much code. Many of the samples I looked at had huge switch or if statement blocks to allow for different property types. I was able to use a built in method that replicated the default behaviour and allowed me to add the tool tip.
public class ToolTip : PropertyAttribute
{
public string TipText = "";
/// Display text when the mouse is over the label.
public ToolTip(string message)
{
TipText = message;
}
}
using UnityEditor;
using UnityEngine;
using System;
/// Display a tool tip when the mouse is over the label.
[CustomPropertyDrawer(typeof(ToolTip))]
public class ToolTipDrawer : PropertyDrawer
{
private ToolTip source { get { return ((ToolTip)attribute); } }
/// The height returned here must be appropriate for the property
/// being dawn.
public override float GetPropertyHeight (SerializedProperty property,
GUIContent label)
{
return GetOriginalHeight (property, label);
}
public override void OnGUI(Rect position, SerializedProperty property, GUIContent label)
{
// Must reset the tip otherwise all labels get the same tooltip displayed!
string previousTip = label.tooltip;
if (!string.IsNullOrEmpty (source.TipText))
{
label.tooltip = source.TipText;
}
// Display the default fields for this property
EditorGUI.PropertyField (position, property, label, true);
// Must reset the tip otherwise all labels get the same tooltip displayed!
label.tooltip = previousTip;
}
/// Returns the height of the default control.
///
/// This can be reused by other property drawers.
public static float GetOriginalHeight (SerializedProperty prop,
GUIContent label)
{
const float spacing = 3f;
float baseSize = EditorStyles.label.lineHeight;
// Most types only use one line so they work with the base but a few are
// multiline and need more work.
float extraLines = 0f;
if (prop.propertyType == SerializedPropertyType.Bounds)
{
extraLines = EditorStyles.label.lineHeight * 2.2f;
baseSize = baseSize + extraLines + spacing;
}
else if (prop.propertyType == SerializedPropertyType.Rect)
{
extraLines = EditorStyles.label.lineHeight * 1f;
baseSize = baseSize + extraLines + spacing;
}
return baseSize + spacing;
}
}
That's it, not much code.
If you don't want to copy and paste, I've included the tool tip code and the code for other property attributes in to a GitHub project called Unity3D Utility Kit.
Download the Utility Kit from:
https://github.com/ThatJCB/Unity3DUtilityKit
The kit includes a test scene to show the usage of the attributes and to prove that they work.
At the moment the property attributes included are:
- A box to display a helpful message, which was my first idea before I got tool tips working.
- The tool tip which displays when the mouse hovers over the label.
- A Regular Expression mask for fields, created by Lasse Järvensivu , many thanks.
- An integer slider that also works with float values to keep whole numbers.
- A divider with an optional heading.
- Scene selection list so you can only enter a scene name that has been included in the build list.
There's some work in progress in there as well and I'll probably add more to the list over time.
That last item, for scene selection, was the reason I started looking at the Property Attributes and Drawers in the first place.
I hope the examples will be useful to others.
Git Broke My Unity Project
I've been using Subversion (SVN) for source control for a few years but finally decided I needed to give Git a try.
For my purposes, working on my own, Subversion has served me very well. I only decided to move because when I went to add an open source project to Codeplex it made it quite clear at every stage that SVN was not recommended and I got the feeling it was being depreciated out of existence.
It took me a while to get my head round Git and despite what the web sites claimed, I did not think that there are more choices of good Git clients than there are SVN clients. That's just my opinion.
The Git tutorials emphasized it's de-centralised design, which for my purposes has little benefit. I want a central master repository that holds the one version of the truth... that's a discussion for another day.
The one command that the Git tutorials were fairly quiet about was the most important for me. Push. After all the Add and Commit stuff is out of the way, Push uploads it to a server. There is also the reverse Pull that I will need.
After having tried a few, the client I settled on was SourceTree. It's written by the people who provide the BitBucket repository. After I had used it a few times with GitHub I got to like it. It has some handy options that make it easy for me to select the files, add them quickly and then commit and push in one easy action.
It was fairly easy to install but could do with a better getting started guide instead of some basic FAQ's. I am not sure if it is necessary but I did need to read the instructions to create the SSH key:
I would rather not run two source control clients and I liked it enough that I have migrated my active projects.
Now for the one glitch.
All was fine to start with but then MonoDevelop v4.0.1 lost the plot! This is the IDE launched from within Unity v4.3. It would no longer recognise changes I made to classes, so the auto-complete functions stopped working and many sections of my code became coloured red!
The only change was that MonoDevelop had automatically recognised the Git source control and had started to use its Git Add-in.
It only took me a moment to decide that I needed to disable that.
Git add-in disabled, changes committed, Unity and Mono restarted and all was back to normal.
I am not a great fan of having everything built in to the IDE so it is no loss to me that I have had to disable the add-in. I didn't even notice it was there until it went wrong.
Now I can get on and migrate more of my projects to Git repositories.
For my purposes, working on my own, Subversion has served me very well. I only decided to move because when I went to add an open source project to Codeplex it made it quite clear at every stage that SVN was not recommended and I got the feeling it was being depreciated out of existence.
It took me a while to get my head round Git and despite what the web sites claimed, I did not think that there are more choices of good Git clients than there are SVN clients. That's just my opinion.
The Git tutorials emphasized it's de-centralised design, which for my purposes has little benefit. I want a central master repository that holds the one version of the truth... that's a discussion for another day.
The one command that the Git tutorials were fairly quiet about was the most important for me. Push. After all the Add and Commit stuff is out of the way, Push uploads it to a server. There is also the reverse Pull that I will need.
After having tried a few, the client I settled on was SourceTree. It's written by the people who provide the BitBucket repository. After I had used it a few times with GitHub I got to like it. It has some handy options that make it easy for me to select the files, add them quickly and then commit and push in one easy action.
It was fairly easy to install but could do with a better getting started guide instead of some basic FAQ's. I am not sure if it is necessary but I did need to read the instructions to create the SSH key:
I would rather not run two source control clients and I liked it enough that I have migrated my active projects.
Now for the one glitch.
All was fine to start with but then MonoDevelop v4.0.1 lost the plot! This is the IDE launched from within Unity v4.3. It would no longer recognise changes I made to classes, so the auto-complete functions stopped working and many sections of my code became coloured red!
The only change was that MonoDevelop had automatically recognised the Git source control and had started to use its Git Add-in.
It only took me a moment to decide that I needed to disable that.
Git add-in disabled, changes committed, Unity and Mono restarted and all was back to normal.
I am not a great fan of having everything built in to the IDE so it is no loss to me that I have had to disable the add-in. I didn't even notice it was there until it went wrong.
Now I can get on and migrate more of my projects to Git repositories.
Labels:
Git,
MonoDevelop,
Open Source,
Source Control,
SourceTree,
Subversion,
SVN,
Unity3D
Saturday, 22 March 2014
Networking with Photon for Unity
I have not had as much time to spare for this project over the last month as I would have liked. My real work that pays the bills has been so busy I have only been able to tinker here and there but I am still making good progress. Tinkering in Unity produces results much quicker than it did in XNA.
My decision to develop the menus first to learn how to use Unity has been a good choice. I have learnt a lot about the component model used by Unity and some of the best ways to do things.
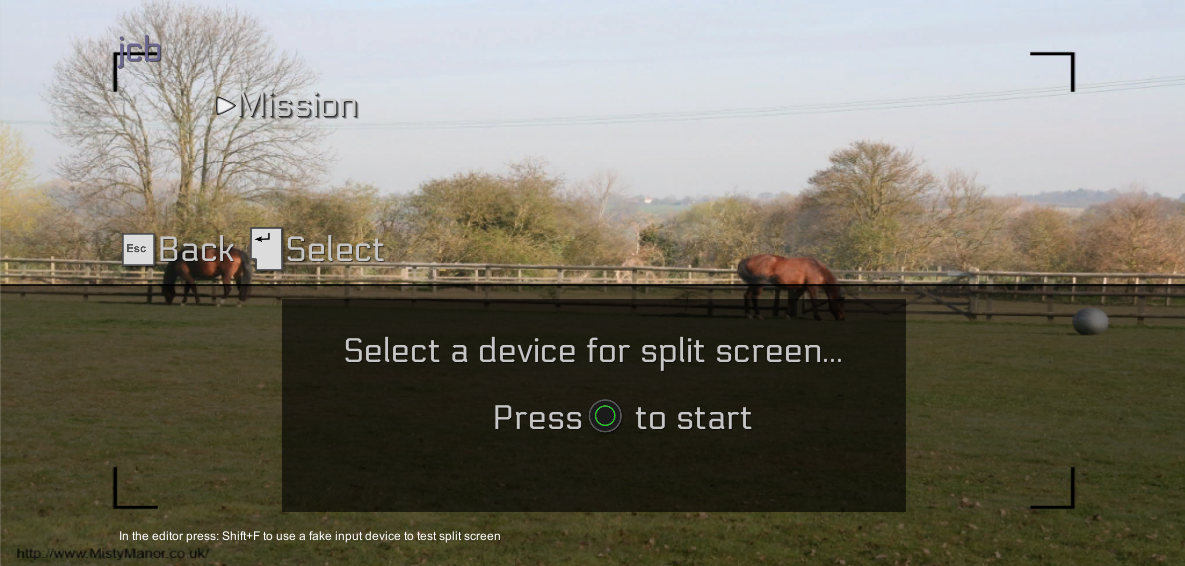
I have a menu system that works with the keyboard, mouse and gamepads and I have got as far as adding split screen including a test scene to show it in action. I have added the usual console style features, like popping up a message when a gampad disconnects and buttons to show which keys to press.
I am itching to get on and build the levels and add characters to the game BUT from my experiences with XNA I want to sort out how network play will work before I start on the game scenes. I will eventually get to the main subject of this article which is about using the Photon Unity Networking service. First a bit about why I chose to use that.
With XNA I made the mistake of developing movement that was difficult to translate in to something that works over a network.
To avoid that I have been reading up on Unity networking. To cut a long story short the Unity network model is limiting. Not bad, it just has limits, which is exactly what I needed to know before going too far in the wrong direction.
I won't go in to detail about how Unity networking is used because that was not the point of writing this article.
All that I need to say is that having read lots of forums and tutorials most people have concluded that using a third party network provider has advantages over the built in Unity networking. Most commonly in threads people quote that Unity have not put much effort in to improving their networking for several years. The other area mentioned is that the Network Address Translation (NAT) punch through that end users can often have to struggle with on their home routers can be avoided with a cloud provider.
I have therefore decided to use a third party network solution by Exit Games called Photon.
There are several providers to select from but I liked Photon because it has a similar object model to the built in solution which helps when reading samples and tutorials and is also relatively easy to convert from one to the other. They have also put a lot of effort in to producing Unity samples.
Another important consideration, for me, is that during development it is low cost. In fact free for 10 concurrent users, which is plenty for testing.
Photon have good documentation and is easy to sign up to at no cost.
https://www.exitgames.com/
I should point out that I have no connection with Exit Games or the Photon service.
Adding Photon networking in to the game is as easy as importing the package. Making the game work as a network game still requires the same processes of adding network views to moving objects or using Remote Procedure Call (RPC) methods but Exit games have several examples and tutorials.
I was up and running in no time and the add-in includes a Unity Editor menu for putting in the necessary details in to the demo project:
Watch out for their web site though. It has a drop down to swap between the various services they provide. Look out for Photon Unity Networking (PUN).
You get different menus, different documentation and different account details if you have selected a different service.
Testing
Unity will only run one instance of the same project so I made two copies of the Photon Demo project, set one to run in the background...
...left the other unchanged. Opened both in Unity and ran them both side by side:
Photon has another advantage in that single player and multiplayer can share the same code. Photon can be set to offline mode and all the code just works without any changes. I have tried that out to confirm it and it does.
I added the above code in to the networked Photon Viking demo to try offline single player.
The one missing bit that I would like, is local LAN play for testing multiplayer code while not connected to the Internet. This is not documented by Exit Games. They do offline single player or online multiplayer.
There is a solution for offline multiplayer if you have a Windows PC. It requires installing the server locally. Photon provide the server executables so you can run your own server. I don't think it was intended for testing offline but it works.
Photon provide good and quick documentation to get the server installed on a Windows PC so I won't repeat that.
I will just summarize it:
When I tried it out I was connected to a network. I ran the 'Load Balancing (My Cloud)' option and set the IP address to Local. That was just two clicks from the sys tray menus.
I had to initially set the Windows Firewall options to enable network access but that was from an automated Windows popup. It all worked flawlessly.
I could swap between local and cloud server by changing the settings from the Photon menu:
I used the same demo, side by side but this time it used the local server.
I added the above code in to the networked Photon Viking demo to swap between local and cloud servers.
The above is all that most people will need.
The following is only useful to a very small minority that want to test networking while totally disconnected, such as on a train or in an airplane.
I hit one snag with the local server. When I had no network connection at all the server does not run. This happens to me every day when I am working on the train.
As far as I can tell this is an oversight in the design. If all the network adapters on a Windows PC are disconnected then there is no IP address for the Photon server to bind to.
There may be some Photon server settings to enable it to work but I got round this quickly by installing the Microsoft Loopback adapter. That is basically a dummy network interface that is always present. It is intended for testing networks but it does no harm and is included as standard with Windows installs, although not enabled.
For Windows 8 it is installed from Device Manager.
That will add the extra adapter in to networking but I did not have to do anything with it.
By default this is set to use DHCP but luckily it falls back to Microsoft's
default IP address which is fine. Just the adapter's presence is enough.
The Photon Server will now always have an IP to use locally. Remember that IP is only any good for testing and only really necessary when no other network connections are available.
That last little bit may only be useful to a few but there is little if any documentation that I could find on using the server totally disconnected.
I can now run the demos completely offline:
I'm all setup to work on the connection and lobby scenes.
My decision to develop the menus first to learn how to use Unity has been a good choice. I have learnt a lot about the component model used by Unity and some of the best ways to do things.
I have a menu system that works with the keyboard, mouse and gamepads and I have got as far as adding split screen including a test scene to show it in action. I have added the usual console style features, like popping up a message when a gampad disconnects and buttons to show which keys to press.
I am itching to get on and build the levels and add characters to the game BUT from my experiences with XNA I want to sort out how network play will work before I start on the game scenes. I will eventually get to the main subject of this article which is about using the Photon Unity Networking service. First a bit about why I chose to use that.
With XNA I made the mistake of developing movement that was difficult to translate in to something that works over a network.
To avoid that I have been reading up on Unity networking. To cut a long story short the Unity network model is limiting. Not bad, it just has limits, which is exactly what I needed to know before going too far in the wrong direction.
I won't go in to detail about how Unity networking is used because that was not the point of writing this article.
All that I need to say is that having read lots of forums and tutorials most people have concluded that using a third party network provider has advantages over the built in Unity networking. Most commonly in threads people quote that Unity have not put much effort in to improving their networking for several years. The other area mentioned is that the Network Address Translation (NAT) punch through that end users can often have to struggle with on their home routers can be avoided with a cloud provider.
I have therefore decided to use a third party network solution by Exit Games called Photon.
There are several providers to select from but I liked Photon because it has a similar object model to the built in solution which helps when reading samples and tutorials and is also relatively easy to convert from one to the other. They have also put a lot of effort in to producing Unity samples.
Another important consideration, for me, is that during development it is low cost. In fact free for 10 concurrent users, which is plenty for testing.
Photon have good documentation and is easy to sign up to at no cost.
https://www.exitgames.com/
I should point out that I have no connection with Exit Games or the Photon service.
Adding Photon networking in to the game is as easy as importing the package. Making the game work as a network game still requires the same processes of adding network views to moving objects or using Remote Procedure Call (RPC) methods but Exit games have several examples and tutorials.
I was up and running in no time and the add-in includes a Unity Editor menu for putting in the necessary details in to the demo project:
You just need your own AppID from the Photon web site:
Watch out for their web site though. It has a drop down to swap between the various services they provide. Look out for Photon Unity Networking (PUN).
You get different menus, different documentation and different account details if you have selected a different service.
Testing
Unity will only run one instance of the same project so I made two copies of the Photon Demo project, set one to run in the background...
...left the other unchanged. Opened both in Unity and ran them both side by side:
Photon has another advantage in that single player and multiplayer can share the same code. Photon can be set to offline mode and all the code just works without any changes. I have tried that out to confirm it and it does.
if (PhotonNetwork.offlineMode)
{
if (GUILayout.Button("Use Online Mode"))
{
PhotonNetwork.offlineMode = false;
}
}
else
{
if (GUILayout.Button("Use Offline Mode"))
{
PhotonNetwork.offlineMode = true;
}
}
I added the above code in to the networked Photon Viking demo to try offline single player.
The one missing bit that I would like, is local LAN play for testing multiplayer code while not connected to the Internet. This is not documented by Exit Games. They do offline single player or online multiplayer.
There is a solution for offline multiplayer if you have a Windows PC. It requires installing the server locally. Photon provide the server executables so you can run your own server. I don't think it was intended for testing offline but it works.
Photon provide good and quick documentation to get the server installed on a Windows PC so I won't repeat that.
I will just summarize it:
- Download the server package
- Copy it all to a folder
- Run 'Photon Control' from the appropriate folder for your machine.
When I tried it out I was connected to a network. I ran the 'Load Balancing (My Cloud)' option and set the IP address to Local. That was just two clicks from the sys tray menus.
I had to initially set the Windows Firewall options to enable network access but that was from an automated Windows popup. It all worked flawlessly.
I could swap between local and cloud server by changing the settings from the Photon menu:
if (!PhotonNetwork.connected)
{
if (GUILayout.Button("Use Local Cloud"))
{
PhotonNetwork.PhotonServerSettings.UseMyServer(
ServerSettings.DefaultServerAddress,
ServerSettings.DefaultMasterPort,
PhotonNetwork.PhotonServerSettings.AppID);
PhotonNetwork.ConnectUsingSettings("v1.0");
}
else if (GUILayout.Button("Use Internet Cloud"))
{
PhotonNetwork.PhotonServerSettings.UseCloud (
PhotonNetwork.PhotonServerSettings.AppID,
(int)CloudServerRegion.EU);
PhotonNetwork.ConnectUsingSettings("v1.0");
}
}
I added the above code in to the networked Photon Viking demo to swap between local and cloud servers.
The above is all that most people will need.
The following is only useful to a very small minority that want to test networking while totally disconnected, such as on a train or in an airplane.
I hit one snag with the local server. When I had no network connection at all the server does not run. This happens to me every day when I am working on the train.
As far as I can tell this is an oversight in the design. If all the network adapters on a Windows PC are disconnected then there is no IP address for the Photon server to bind to.
There may be some Photon server settings to enable it to work but I got round this quickly by installing the Microsoft Loopback adapter. That is basically a dummy network interface that is always present. It is intended for testing networks but it does no harm and is included as standard with Windows installs, although not enabled.
For Windows 8 it is installed from Device Manager.
- Open Device Manager
- Select the Network Adapters line
- Action -> Add legacy hardware -> Network Adapters
- ...Manually Select from a list (It takes a minute to display the list) then select...
- Microsoft -> Microsoft KM-TEST Loopback Adapter
- Next, Next, Finish
That will add the extra adapter in to networking but I did not have to do anything with it.
By default this is set to use DHCP but luckily it falls back to Microsoft's
default IP address which is fine. Just the adapter's presence is enough.
The Photon Server will now always have an IP to use locally. Remember that IP is only any good for testing and only really necessary when no other network connections are available.
That last little bit may only be useful to a few but there is little if any documentation that I could find on using the server totally disconnected.
I can now run the demos completely offline:
I'm all setup to work on the connection and lobby scenes.
Subscribe to:
Posts (Atom)