Bake
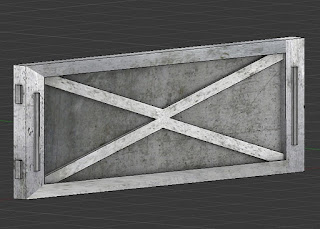
This is the term used to describe fixing a machine calculated effect in to a static texture. The modeling or graphics programme calculates some pattern which can be changed and tweaked by the artist until they are happy with the result. Once they have the final version it has to be merged in to the product, usually a texture, so that it can be viewed or used outside of the programme that generated it.
This is the term used to describe fixing a machine calculated effect in to a static texture. The modeling or graphics programme calculates some pattern which can be changed and tweaked by the artist until they are happy with the result. Once they have the final version it has to be merged in to the product, usually a texture, so that it can be viewed or used outside of the programme that generated it.
There were loads of links here are just a couple:
http://www.katsbits.com/tutorials/blender/blender-2.5-baking-ambient-occlusion.php
- Create the model
- UV wrap the model and manually position the UV's so they do not overlap.
- Select the model in Object Mode
- Find the Bake panel at the end of the Render section (little camera icon)
- Select Ambient Occlusion...
- Tick (check), Normalise and Clear.
- Press the Bake button.
- Save the new UV texture, which is just the shading.
- Use that texture as a layer in GIMP or Photoshop. Set the layer type to Multiply so the white areas use more of the underlying colour and the black areas use less of that colour. (Initially I was converting the white areas transparent, Color to Alpha in the layer menu and change the white colour to transparent. That works just as well but had one more step.)
- Save it as a PNG
- Reload it in to Blender.
Now I have a textured model with shading.


No comments:
Post a Comment